Showing posts with label Shirtdress. Show all posts

Sunday, June 26, 2016

Miss Irene and the Yankee Doodle Dandy: McCalls 7351


In sewing, mistakes are inevitable. Perhaps you accidentally clip a seam allowance and the seam, or you decide to skip interfacing this one time. Some overzealous scissor wielding or a too hot iron and a whole project can be ruined in seconds. Kittens, I've been there. 

Personally, my most regrettable mistakes all involve fabric. Whether choosing a knit with too little stretch or blindly ignoring something's polyester content, I've done it all. The worst, however, are the projects which paired beautiful lengths of fabric with mediocre, ill-fitting patterns. Most of those were before this blog started, but there have been some doozies even in the last six years! The one I look back on with genuine sadness is actually my very first shirtdress, the Sally Shirtdress from 2014. 

Despite that post's optimistic ending, it did not get a ton of wear. I wore the dress twice more, before consigning it to the back my closet forever. Both times, I couldn't wait to get back home and take the damn thing off. The buttons pulled constantly and the fabric bunched in odd places. Despite the luxe chambray and beautiful vintage buttons, it was a total disaster to wear. The pattern didn't work for me, simple enough.

And yet, I still loved the style. Dark blue chambray and red buttons are such a classic American combination. There's no garment more appropriate for a summer BBQ or 4th of July parade, unless you actually swath yourself in star spangled banners a la Pollyanna. 

Pollyanna: Taking cheerfulness and a theme too far, since 1913.

While the patriotic body bag was a tempting look, instead I decided to have another go at that chambray dress. This time, I armed myself with a better pattern and two more years of pattern fitting experience. Even the fabric got a little nicer, with this dishy Rag & Bone indigo cotton chambray from Mood. Thanks to a plain weave and strategic thread patterns, the fabric looks like a true denim, but has the lightweight feel of a drapey shirting. There's also a soft iridescence to its face, which changes the blue in different angles. 

For the pattern, I opted for my new go-to shirtdress pattern, which you've all heard about to death. This is McCall's 7351 (surprise!) with my altered narrow silhouette, which added waist darts and hip ease to View A. This is actually one of those dresses from my furious batch sewing binge, back in May. The other two didn't photograph as well, after a month of wearing and washing, so will have to make their debuts on Instagram at some point. 

Why, yes, I am dying to snip those errant little threads on the collar. 
While I wanted to use the vintage embossed buttons from my original Sally Shirtdress, fate had other plans. In my manic closet cleaning, this spring, that dress accidentally ended up in a charity pile instead of the refashion box. Somewhere, I hope someone is greatly enjoying those gorgeous buttons! This dress had to settle with plain red plastic buttons from JoAnn Fabrics. Their color pops off the dark chambray beautifully and matched some stashed thread, so it all worked out rather well. 

The construction details of this dress are exactly the same as my previous versions, down to top-stitching all the things and self-fabric finishes. However, if you squint at the picture above you can see a special little change. All the top-stitching thread is red! It's more apparent in real life than in pictures, but I adore it. Coordinated stitching is something that I love in ready-to-wear designs, yet rarely do myself. There's too much room for error, when every stitch is that obvious. This dress seemed worth it, though, and the extra time for perfectionism paid off. The collar and button bands look gorgeous. 


And that, my dears, is victory. The dreadful mistake is finally undone! I love this dress. It feels wonderful to own a version of this style that I will actually wear. There's no unsightly bunching or pulling, here. It's all perfectly fitting, perfectly comfortable chambray goodness.

Even better, that's my outfit sorted for our annual 4th of July party, next month. Now, I'll spend the next week deliberating varieties of pie to make, instead of what to wear. Apple and cherry are a must, but blueberry mascarpone or chocolate cream for the third? Decisions, decisions... 

Let's be honest, much like shirtdresses, I'll probably just make them all. 

Wednesday, June 8, 2016

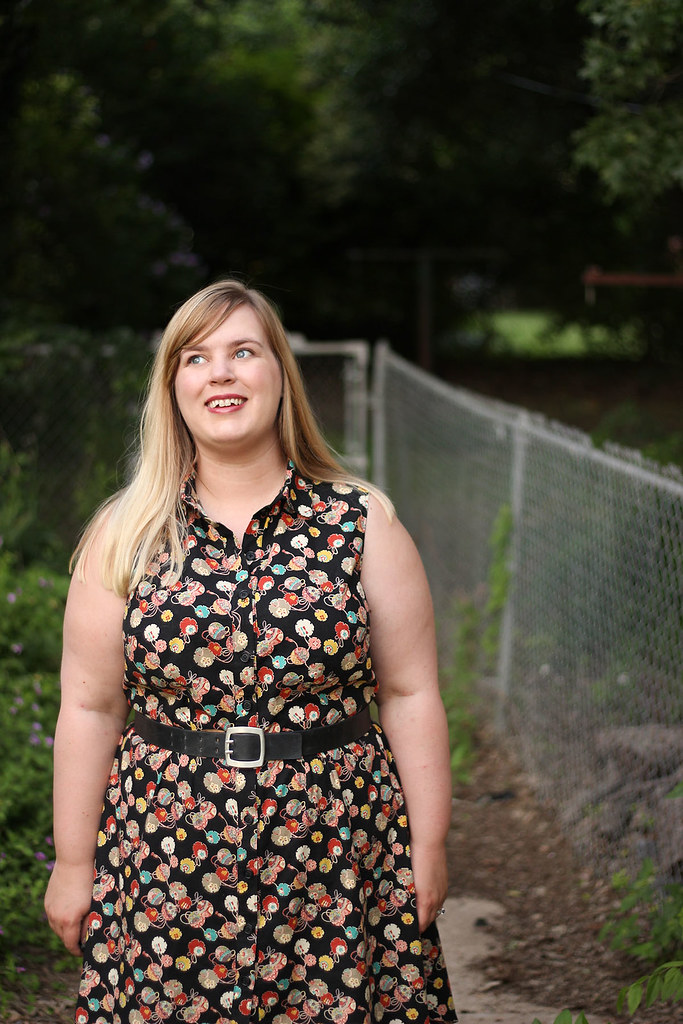
Miss Irene Lights up the Night: McCall's 7351

McCalls 7351 -- Idle Fancy -- Japanese Lantern Cotton-1-2

There are times when sewing is more than a craft. 

In graduate school, this hobby was something I could conquer and control within a set time frame. That last part was particularly important. My dissertation was a year-long process of frantic writing and re-writing, but a few hours was all it took to make a well-fitting dress. Such quick project resolutions were a godsend, especially in comparison to the graduate work that wouldn't end. 

Nowadays, sewing tends to be a more practical part of life. I sew, because I don't really buy ready-to-wear anymore. Other than jeans, sweaters, and lingerie, everything in my closet is homemade. If I want a new dress, or a cute off-the-shoulder blouse, I raid the fabric closet and make it myself. It's fun, but it's rarely a case of true mental self-care. 

Until last month, of course.

McCalls 7351 -- Idle Fancy -- Japanese Lantern Cotton-28

Sam and I had a week from hell, y'all. Right after school ended, we were supposed to embark on an epic road trip of the Southeast. Instead, the night before our trip began, the plumbing in our mid-century house went haywire. Our master bath flooded, all plumbing in the house became unusable, and it took plumbers four days to show up and fix the problem.

Meanwhile, poor Sam came down with a vicious stomach bug. The universe has a damn fine sense of humor, kittens. 

So, our trip was put on hold and we were landlocked. First, in a hotel room, then finally back at our own house, as the beloved recuperated. Sewing became a matter of sanity preservation, once again. In that one week, I cut out and sewed four more variations of McCall's 7351. While there are other patterns in my queue, I wanted solace from my sewing. I needed to make pieces that would definitely work out and would instantly fit into my wardrobe. Shirtdresses were a guaranteed win on all fronts. 

McCalls 7351 -- Idle Fancy -- Japanese Lantern Cotton-42

I'm going to combine the other dresses into one big post, but this first one deserved special attention. Not only is the fabric a beloved piece, but this dress was a template for the other three. After my last version of M7351, I changed the pattern to better suit my preferences. 

While I loved the casual elegance of that straight skirt, it wasn't terribly comfortable to wear. It felt more restrictive than I'm used to and made me long for a pair of Spanx. In order to make the straight skirt silhouette work for me, I made a few crucial changes: 
  1. Widened the skirt by four inches. 
  2. Changed the shape to a slight A-line. 
  3. Added four darts at the front and four darts at the back, for a better fit at the waist. 
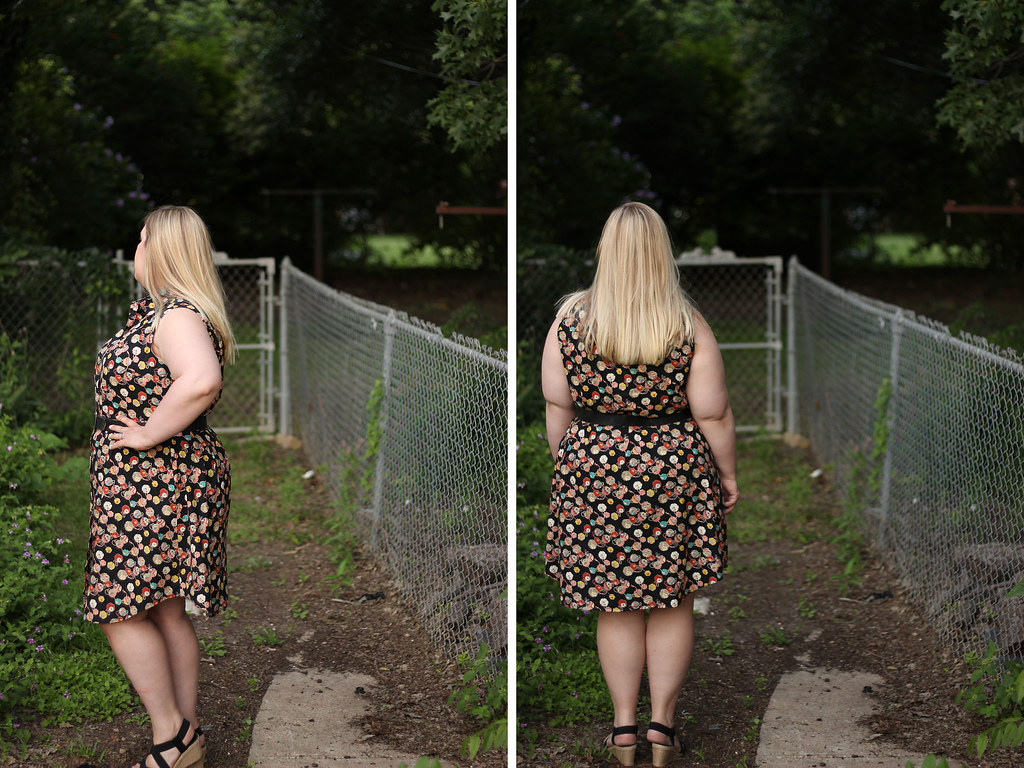
The end result is a dress that has the same casual feel of the original design, but skims my lower body more. It's still a much different silhouette than M6696 or the full-skirted M7351. With the shirt-tail hem and A-line shape, it's almost like an elongated man's shirt. You know, with that all important waist definition. 


McCalls 7351 -- Idle Fancy -- Japanese Lantern Cotton -- back and front

It's funny, I'm still calling this McCall's 7351, but I've certainly veered away from the original pattern. The silhouette may be similar, but between bodice and skirt changes over multiple versions, the pattern pieces themselves look radically different. I've somehow turned a simple, two dart shirtdress into a project with twelve darts! Mary Danielson Perry: complicating the issue since 1985. 

I love where the fit has ended up. The waist lays closer than the original and the bodice fits so nicely that I've already turned it into a button-down shirt pattern, as well. The experiments won't end there either. I'm currently testing how this pattern looks with the pleated skirt of M6696. I'm guessing it's going to be winner, as well. This pattern is such a great canvas for design alterations. 


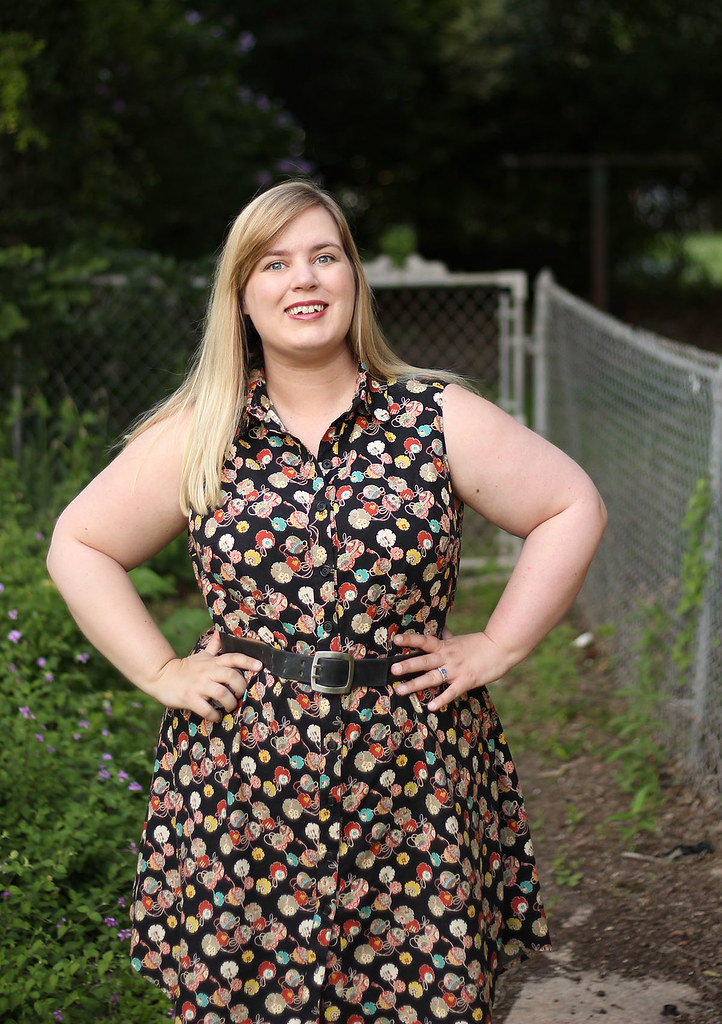
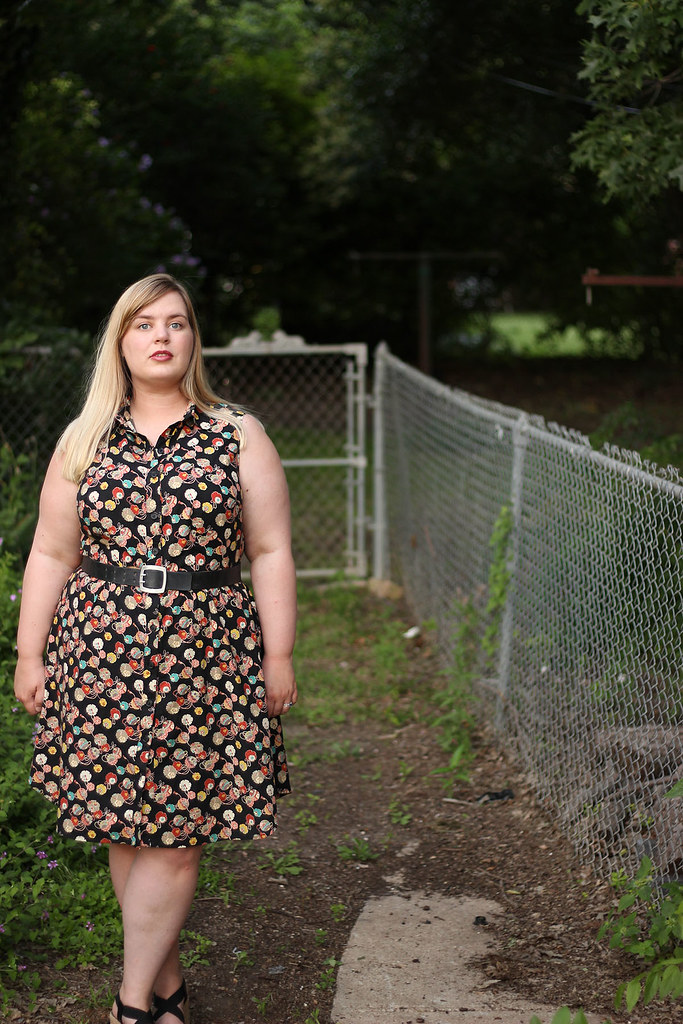
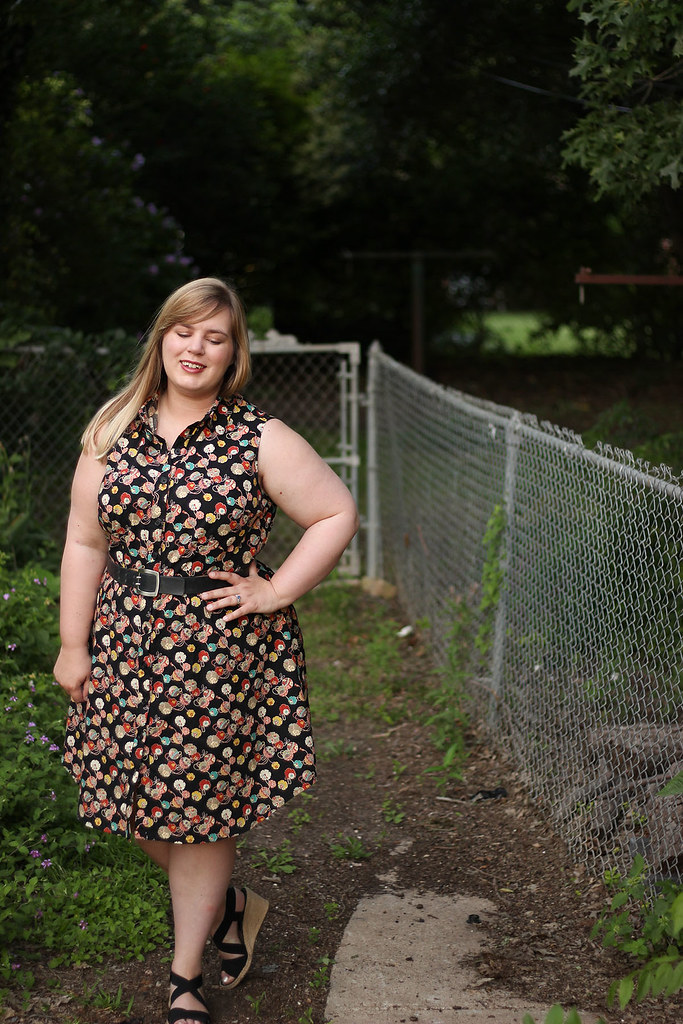
This fabric, as mentioned, is a favorite of mine. It was a gift from my mother, for my thirtieth birthday, last year. That comes as no surprise, if you've met her. My love of bright novelty prints on black backgrounds comes honestly, friends! This is a Japanese cotton print from B&J Fabrics, but no longer available on their site. It's a lightweight broadcloth with a crisp hand and, as you can see, is covered in lovely, colorful paper lanterns. The color palette is a retro mix of earth tones and muted pastels, which balances the sweetness of the print in such a great way. Mom has awesome taste, right?

I only had three yards of fabric, so barely eked out this dress. To cut corners, I used a pale dotted yellow cotton batiste as the yoke lining and bias bindings. Apart from the under-stitching on the yellow, the whole dress was sewn and top-stitched with black thread. It breaks up the print enough to make the details pop. Huzzah!

McCalls 7351 -- Idle Fancy -- Japanese Lantern Cotton-14

McCalls 7351 -- Idle Fancy -- Japanese Lantern Cotton-39

Now, I know the whole world is posting shirtdresses right now. Between the McCall's sew-along and all the new patterns coming out, it's a great time to practice your shirt-making skills. You might be tired of all those collars and buttons marching into your feeds, but...I am probably going to keep posting them. I did once promise to make 1000 of the things, after all. 

This one, at least, did its job well. Not only is it on constant rotation in my wardrobe, but it was the perfect comfort project for that hellish week. Luckily, since then, things have looked up! We went on an attenuated version of that trip, safely made it through the Southeast to visit Sam's family, and returned home to delighted dogs and a perfectly working plumbing system. 

Small victory, but I'll take it! 

Sunday, April 17, 2016

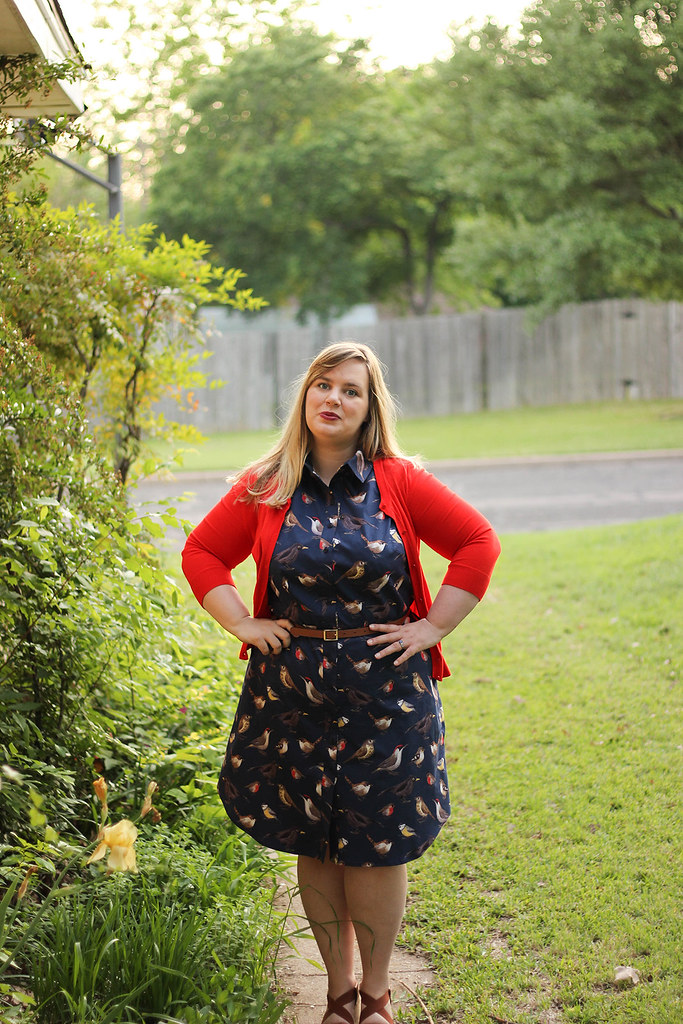
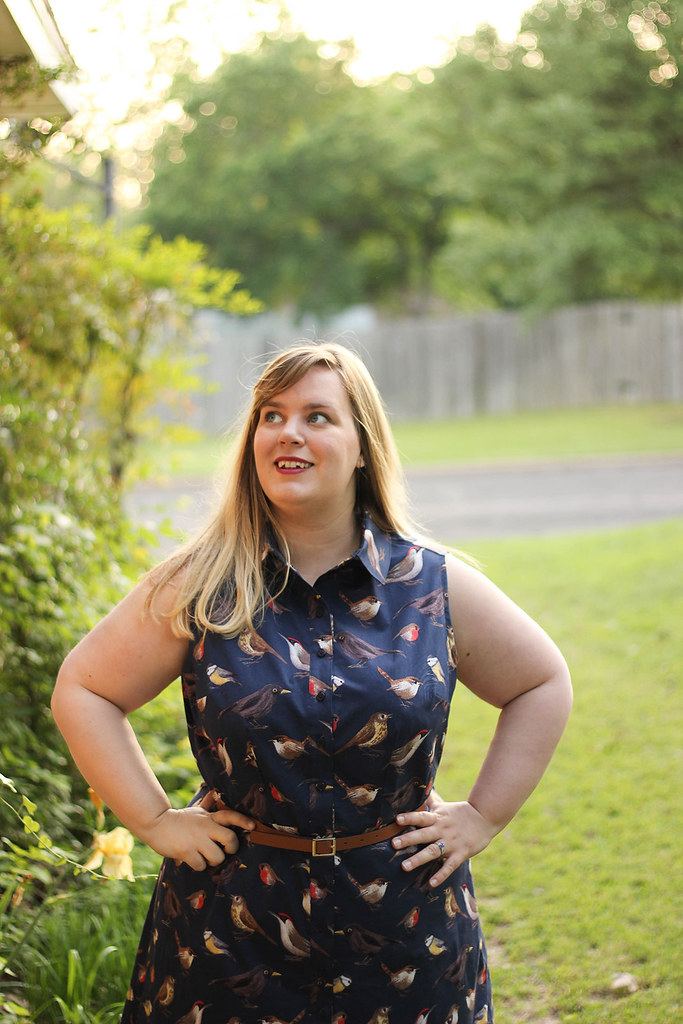
Miss Irene is for the Birds: McCall's 7351

Idle Fancy - McCalls 7351 - Bird Print Shirtdress-1-2

Good evening, kittens! After too many weekends on the road, Sam and I are spending this one firmly ensconced at home. The NBA Finals are on TV, both dogs are napping by the back door, and an impressive line of thunderstorms is moving in. We couldn't ask for a lazier, more peaceful Saturday off. Dog snores and all.

At some point, I have a book to finish writing and this month's Knipmode project to trace out, but we're not going to dwell on that right now. Instead, let's dive into my comfort zone.

Oh look, I made another shirtdress!

Idle Fancy - McCalls 7351 - Bird Print Shirtdress-1-5 


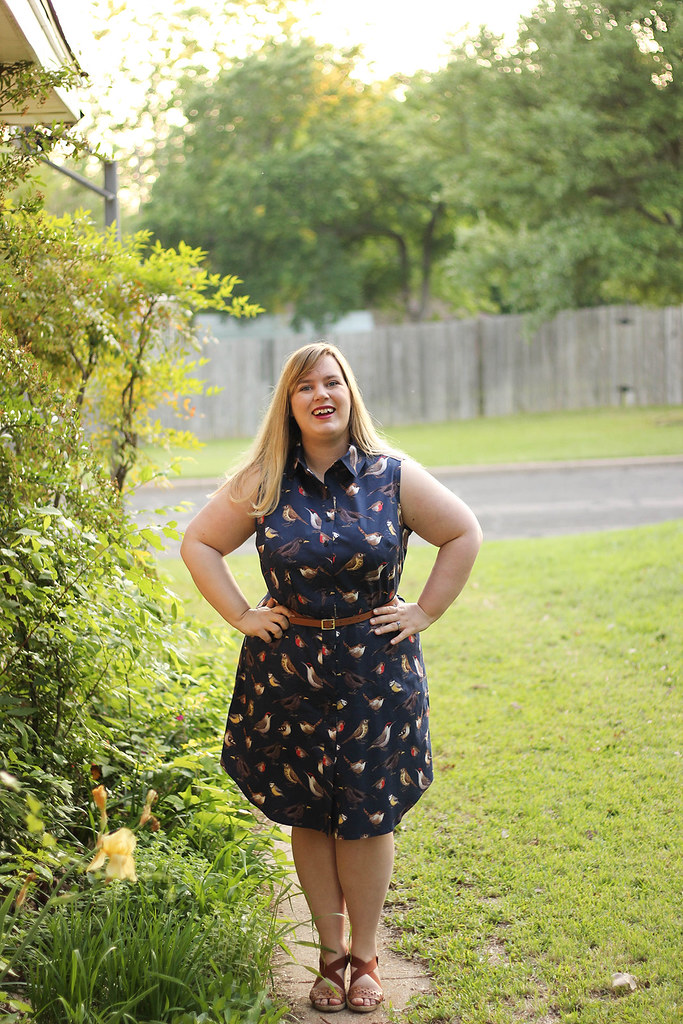
After the rousing success of my first McCall's 7351 shirtdress, I began work on another variation. The slim style and shirt-tail hem of View A piqued my interest. It's a more casual, modern silhouette than the full skirts overflowing my closet. We could blame personal style for that oversight, but...it's a complicated issue. Slimmer skirts easily verge into sexy secretary territory on me, thanks to the ratios of my curves. The A-line of this skirt had potential, though, and I was willing to experiment.

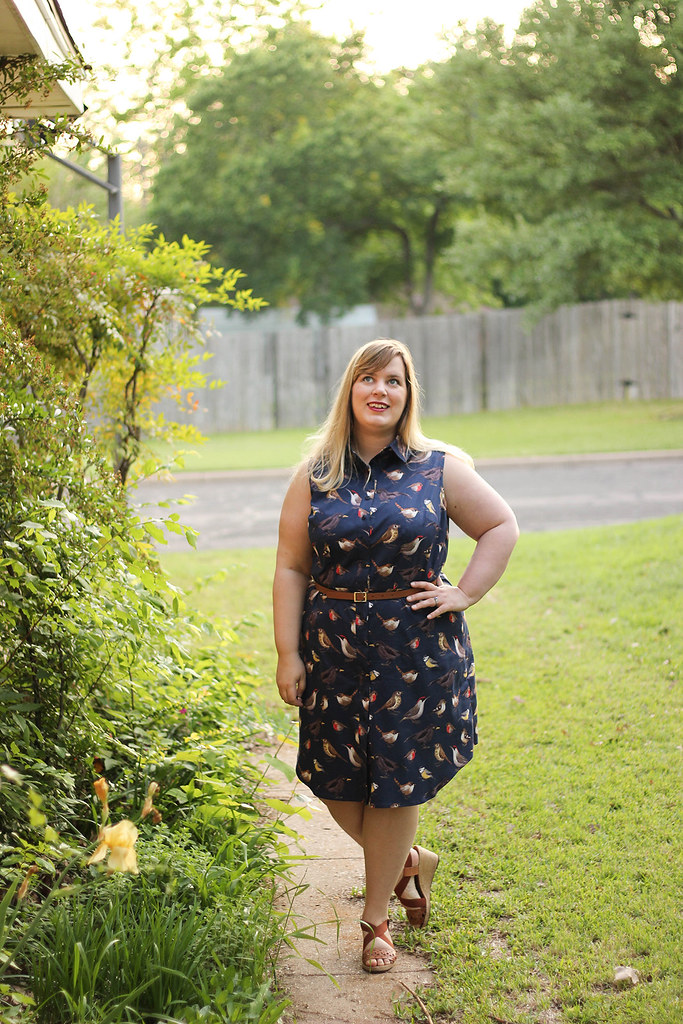
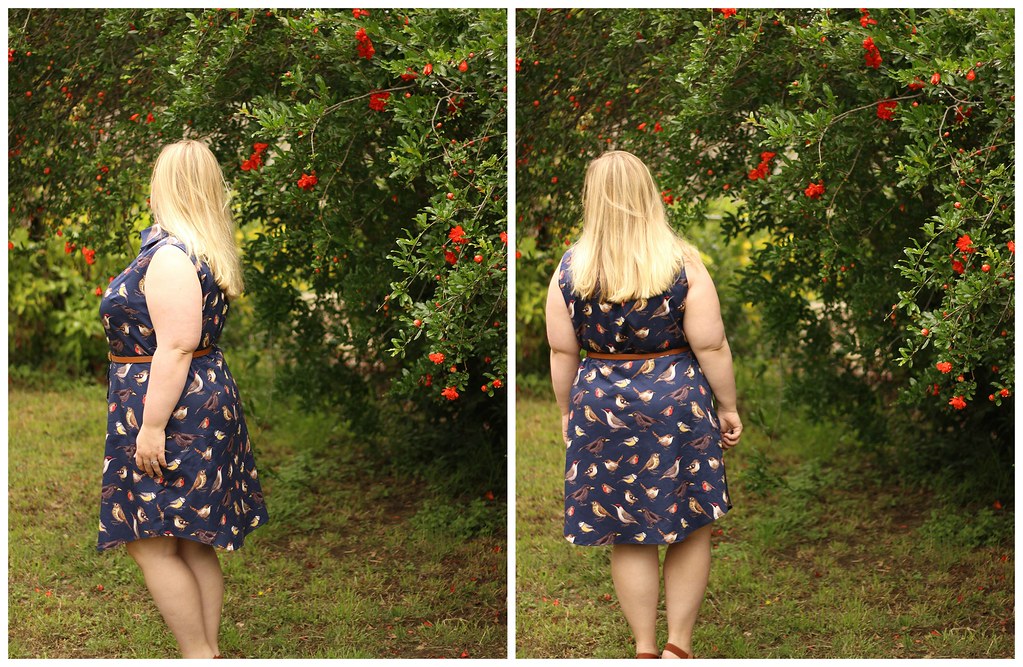
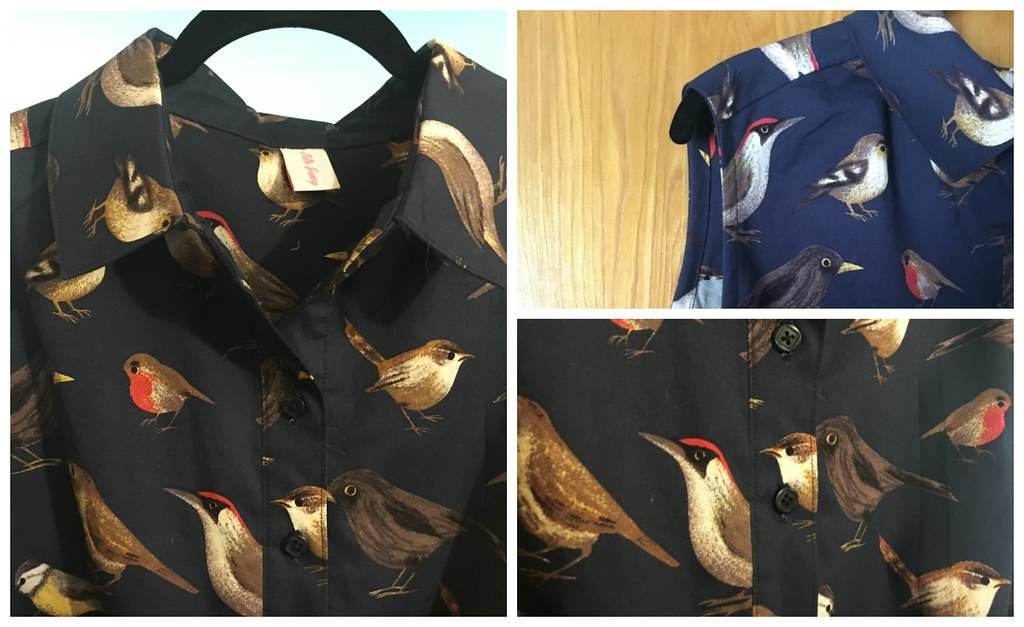
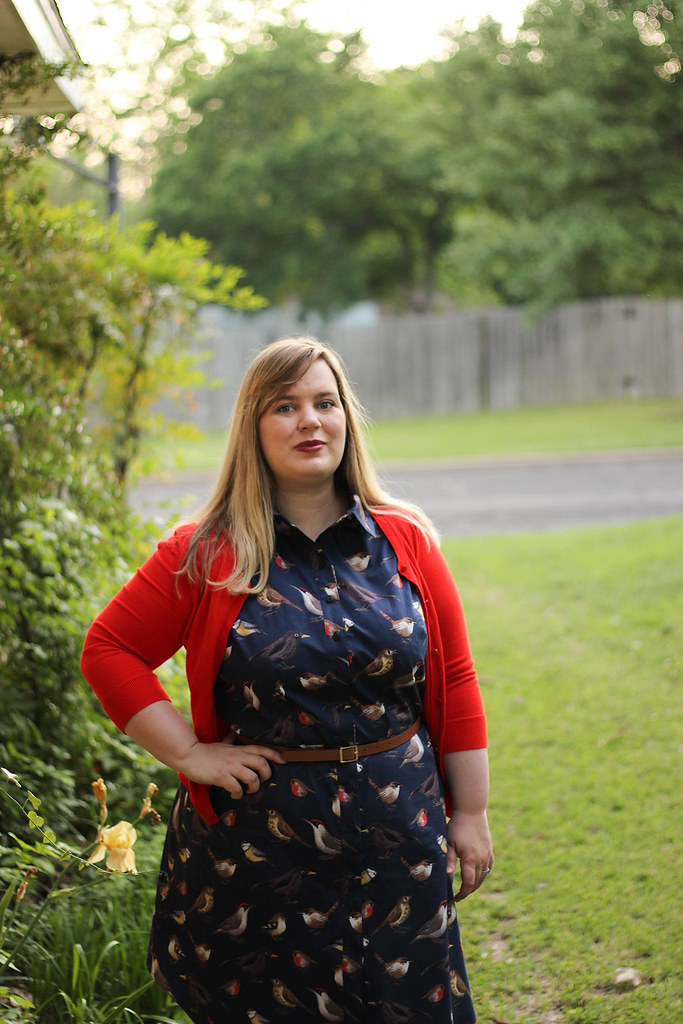
Even better, I had the perfect fabric in my stash. This navy blue cotton twill from Mood has a good deal of stretch and is covered in realistic bird illustrations. Y'all, I'm trying really hard not to make obvious Portlandia jokes right now. It might be a losing battle. Anyhow, I'm a sucker for novelty prints and stretch cottons. The heft of this twill is a true medium weight, with a super crisp drape, making it ideal for the tailored details of a shirtdress. It washed and pressed like a dream.
 
  sideback 

Sewing with it was another matter. It turns out the stretch threads in this fabric are delicate, prone to snagging and running. They caught on my scissors, my rotary cutter, and even my sewing table. This cotton needed babying like you wouldn't believe. The birds are worth it, but I was glad to have the project finished without incident. Visions of massive, dress-ruining runs danced in my mind. 

The actual pattern came together without incident. Once again, I sewed almost everything by machine. Top-stitching, how I love you. The yoke and armscye bindings are finished with the same fabric, while every other seam was serged with white thread. Once the seams were finished, I didn't have any further trouble with the fabric. It was only the raw edges that made it so finicky. 

As you might notice, this dress is not pattern matched. The scale on this cotton was large and I didn't have enough fabric to pull it off. Instead, I paid close attention to the layout, while cutting things out. All the birds are situated right side up and there aren't any terrible twining repeats. Let's call that a win, shall we?

details
My alterations were the standard stuff, only slightly different from my last version. The one inch FBA remained, along with the lengthened darts, but I narrowed the shoulder further and raised the armscye by almost an inch. The bodice fit is exactly where I want it now. Everything is spot on, from the collar size (still awesome!) to the bodice ease. Hooray! That means I need to make six more of these dresses, to revel in the fit a bit more. 

As for the slim skirt, I'm actually torn. I blended from the size 20 bodice to a size 22 at the skirt, to accommodate my hips properly. This gave me enough ease and resulted in a dress identical to that on the pattern envelope. Objectively, I know it looks good. The fit is nice, it's a chic silhouette, and all is as imagined. Only...

I like a fuller skirt. Surprise!


This dress looks great, I'm simply not as comfortable in it.  Perhaps with more wear that will change? It doesn't have me reaching for Spanx, but I'm also more conscious of what I'm wearing than I normally would be. This, my dears, is why I never make wiggle dresses anymore. They sit in my closet, admired, but unloved. If this skirt were a true pencil shape, it would be doomed. 

Luckily, the A-line is easy enough to wear. I still like the silhouette quite a bit, as well. It would look sensational made up in a light blue chambray for summer. I will probably tinker with the skirt a little bit, adding more ease, while keeping the simplified shape. We shall see...

In the meantime, I'm digging both the birds and this pattern. You can tell it's a winner, because collars and buttons are all I want to sew right now. Every length of fabric in my stash seems ideal for a shirtdress. I should take advantage of this mojo, before summer comes and my obsession with light, breezy knits returns. Today, I fantasized about a red polka dot Myrtle dress, so that time may be all too soon!
 

Note: The fabric for this project was provided by Mood Fabrics, as part of my participation in the Mood Sewing Network. It was chosen by me, however, and all opinions are my own. 

Friday, February 6, 2015

Miss Clara Predicts an Early Spring: McCall's 6696


Hello, lovelies! Perhaps you thought that, with the end of 1000 Shirtdresses, I would be finished with McCall's 6696. However, spring looms in Texas. That means the lighter, brighter fabrics in my stash are demanding buttons and collars of their own. While I do have many other things on the docket, I made two shirtdresses in late January, especially for those warmer months: one floral and one plaid. Even better, I finally photographed one of them! 

This pastel cotton lawn has been in my stash for five or six years. With Liberty-like softness and all those pretty purple flowers, it's ideal for a sweet, springy shirtdress. (God, that's a lot of alliteration. Forgive me, friends.) Unfortunately, it was also really, really narrow. With four-and-half yards, I was just able to squeak a sleeveless 6696 out of it. 


After five previous iterations of this pattern, there shouldn't be more to say about it. However, I went for a different finishing route with this one. After all that sitting around in a closet, this particular fabric deserved extra flourish. With such a dainty print, why not throw in a few pretty techniques, as well? 

Instead of my usual shirtdress methodology of Topsitching All The Things, I instead hand-sewed all the details. The button bands, waistband, yoke, and hem were secured in place, using simple slip stitch. Meanwhile, the armholes were finished with self-bias tape and a catch-stitch. It all made for a beautiful, clean finish. Woohoo for unnecessary attention to details! 

One certain detail really makes me swoon over this dress, however. Instead of picking clear buttons, or contrasting ones, I covered eleven half-inch buttons with the same floral lawn. Sure, they blend in in these photos, but they add a lovely, feminine touch, in person. My fingertips hurt for two days afterwards, but it was worth it! Oh, sewing...


There's not much more to say about this dress, dear ones. The only fit change I made was to raise the armholes another half-inch. So interesting, no? In the end, this is a fabulous dress for spring. The colors come off a little washed out, in the winter light of these photos, but they're quite pretty in real life. It's going to be cute with a coordinated cardigan and espadrilles. 

Best of all? Next week, our temperatures hover around 70 degrees. It's always nice to actually wear the dress you've recently spent five hours hand sewing! 


Sunday, December 14, 2014

Miss Clara and the Seasonally Inappropriate Christmas Dress: McCall's 6696


When planning a dress for the holidays, a certain aesthetic comes to mind. This is the season for plaid taffetta and long-sleeved wool sheaths. This is, most assuredly, not the season for lightweight poplin printed with hot pink roses. No Northern Hemisphere woman in her right mind would sew such a thing right now. 

Except, apparently, me.

I couldn't help myself. While musing on Christmas dresses, this Liberty cotton lodged itself in my mind and wouldn't budge. I've hoarded four yards of this poplin, in the pink Carline print, for years. Not only is this my favorite Liberty print, but it's also maddeningly discontinued. I have another two yards in blue, awaiting the perfect blouse pattern, and an Ebay alert set up for the red colorway. Carline is my fabric white whale. 

This particular length was bought with a shirtdress in mind. Of course. Since then, McCall's 6696 has come into my life and my collar-making skills have improved tenfold. Not only would this be an ideal Christmas shirtdress, I decided, but I probably wouldn't ruin it in the process. Score! It was time for Carline to have her day. 


True to form, I couldn't leave well enough alone. Heaven forbid, I take the easy way and make an unaltered, perfect-as-she-is 6696. That would be too easy, too stress-free! Instead, I decided to turn my beloved shirtdress pattern into a half-shirtdress pattern. I would use the bodice of 6696, paired with a straight waistband, full, gathered skirt, and side zip closure. 

Despite my dramatics, this is actually a straight-forward pattern change. There was some basting involved, to get the waistband just right, but otherwise, it's a simple matter of planning. Let's walk through it, shall we? Note: I didn't set out to make this a tutorial, but rather a guideline of my process, so this isn't a fully photographed explanation. Writing it out, the instructions ballooned in size. I explain everything thoroughly, however, and photographed the two weird parts. If you have any questions, leave them in the comment section!


1. Cut both skirt pieces on the fold. I decided to use the original skirt pieces from 6696, but gather them like a traditional dirndl skirt. You could, similarly, cut two rectangles for a real dirndl skirt, as in Gertie's tutorial. Either way, since we're moving from a front button closure to a side zip, you're going to cut those skirt pieces on the fold, so that you don't have a seam running down the front.

2. Trace a new button band. For a half-shirtdress, you only want a button band the length of your bodice pieces. So, measure the length of your bodice center fronts, then mark that length on your button band piece. Trace that portion of your band and--voila!--new bands.

3. Measure your waistband. Your impulse for this project will be to add the length of your button band to your original waistband, to create a slightly longer one. This is actually not the way to go. Full shirtdresses have more ease around the waist than a half-shirtdress, to prevent button gaping. How much ease you want at the waist will be up to you (standard is 1'', but I prefer 1/2''), but it's likely that 6696's waistband will work as-is, without lengthening. Put the pattern piece around your natural waist and try it out! Does it feel comfortable, when you sit? Is it secure enough to add definition? Add or subtract length, based on this decision, and remember to factor in a 5/8'' seam allowance on each end.

4. Mark side seams and centers of waistband. Because we're gathering our skirts in, you'll need to mark your center front, center back, and side seams, so that your skirt is even all around. Begin by adding your seam lines to each end at 5/8'', then measure in from one end at 1/4th the length (Center Front), 1/2 the length (Side), and 3/4th the length (Center Back) between those lines.

5. (Optional) Reduce gathers on back bodice. While the blousing in the back of this dress doesn't bother me, you may want to streamline the back in this version. To do so, simply trace the back bodice piece, then remove your desired amount from between the center gathering marks, in a vertical strip from top-to-bottom. I recommend leaving some gathers in, for ease of wearing, but removing one or two inches from the pattern piece will lessen that blousing quite a bit.

6. Leave the left side bodice open, 3.5 inches from top. We're going to insert an invisible zipper on the left side, so construct your bodice normally, but only sew down part of that side seam. There's no exact science to this, but it should be enough that you'll be able to get into your dress comfortably! Remember to back-stitch, at each end. Construct and finish the rest of your bodice, as usual. 

The left side of my bodice, after leaving it open. 

7. Add button bands, then overlap the right bodice onto the left bodice. After sewing your bodice as you would normally, attach your button bands! Once you have them on and top-stitched, put the right bodice over the left bodice, lining up the bands, then baste them into place. Finish both the collar and the sleeves now. Leave the buttons and buttonholes until the end of dress construction, so you can accurately mark placement, with the skirt attached.

8. Sew the waistband to the bodice. Begin pinning with the left side, still leaving that open, and pin your waistband to the bodice. Align the centers of your front and back bodice, with the marks on your waistband, then baste them together. If you're happy after a fit-check, then sew everything in permanently! Note: you may find that you want to take the waistband in further at this step, or even raise it a little. The proportions of a half-shirtdress are just a bit different from a full, so these changes are natural. 

Overlapped bodice bands attached to the waistband. 

9. Sew the right skirt seam. We're still leaving that left side open, so sew and finish the right skirt seam only.

10. Gather and attach the skirt. Sew two rows of gathering stitches, at 1/4 inch and 1/2 inch, around the entirety of the skirt waistline. Once you've sewn, push along these lines and create your gathers. Match the skirt center front, center back, and side seams to those of your waistband, and even out the gathers across the skirt. Stitch into place. 

11. Insert an invisible zipper. Finish the entire left side of your dress, from bodice to skirt, using your preferred finishing method. (I serged everything, for simplicity's sake.) Then, insert the invisible zipper into the left side, with the top zipper stop aligning with your fabric opening. It's just like sewing an invisible zipper in a skirt or a dress, but the top zipper tape is going into an existing seam. Conversely, you can choose to leave the top left side entirely open beforehand, closing it only after your zipper installation. Either way, make sure your waistbands line up, and have at it!

Resulting invisible side zipper and a peek at my light pink bias tape armscye finish!


12. Sew the left skirt seam. Once your invisible zipper is in place, sew the remaining skirt side seam, below the zipper. Secure the bottom zipper tape into this seam, with a few hand stitches.

13. Buttons and hem. Add your buttonholes, buttons, and hem, as usual!

14. Dance a jig, in your new half-shirtdress. 


Of course, you could also just use an existing half-shirtdress pattern. There's the new wrapped half-shirtdress from McCall's, M7081, and the Lisette Traveler Dress from Simplicity. I didn't use either of these, because the McCall's was just published last week and the Traveler doesn't have a traditional collar construction, which drives me crazy. I figured, the 6696 already fits in the bodice, so why not go with the one I already love? A good design alteration is creatively exhilarating, anyhow!

It's okay to just nod at me, as if I've gone mad. You should use an existing pattern, if you've got one stashed away. 

Apart from the construction techniques above, there are a few little extras in this dress. As is my wont, everything is top-stitched, including the button bands, collar, collar stand, and the waistband. Not only does it cut down on the hand-stitching, but it adds a bit of definition to the busy floral pattern. The armscyes are finished with light pink single-fold bias tape, which goes with the palette nicely. I was going to make self-fabric tape, but couldn't bring myself to waste the Carline. I actually have just enough of this fabric leftover to make a sleeveless blouse. Joy!

The buttons on this lovely are jade green plastic, from Hancock's, and match the green of the rose leaves exactly. Honestly, y'all, as much as I love Carline, those buttons might be my favorite part of this dress. They glow like little emeralds against the rose pattern, don't they?

Of course, I'm wearing this dress with my favorite emerald cardigan right now. It's been pretty mild lately, but things are going to turn chillier this week! We're actually headed to New Orleans next weekend, to spend the holiday week (and our first anniversary!) there with my family. It's not a Danielson Family Christmas, unless we're in some far flung location, eating Chinese food and using a coat stand as a tree. What can I say? We're heathens, the lot of us. 


Wednesday, August 27, 2014

Miss Clara Plants the Night Flowers - McCall's 6696


Good afternoon, my dear vixens! Today, a rare and wondrous thing is happening, I'm showing you a dress I made last week. To those of you who plan out blog posts weeks ahead of time and are extra-meticulous about scheduling, this probably doesn't seem like a big deal. I am not that fastidious of a blogger, however. Usually, I make a thing, get absurdly excited, photograph it the very next morning/sunset, and throw it on the blog. 

Last week, however, I made this McCall's 6696 and let it linger. It was made in a fit of anxiety, before my dissertation defense. There was no more practicing to be done, no more prep to be written, and I wanted--no, desperately craved--something to do with my hands. A certain beloved bearded one even compared me to a hawk circling a family of tasty, defenseless mice. The words "glinty eyed" and "terrifyingly focused" were used more than once, in the soothing tones of someone talking to a stray tiger. 

I'm told all these pre-defense comparisons to carnivorous beasts are normal. I'm certainly going to pretend they are, anyhow.  Luckily for us all, I had this dress to funnel all that terrifying focus into. By the morning of my defense on Tuesday, I had everything but the buttons and button-holes done on this beauty. Well done, nerves!


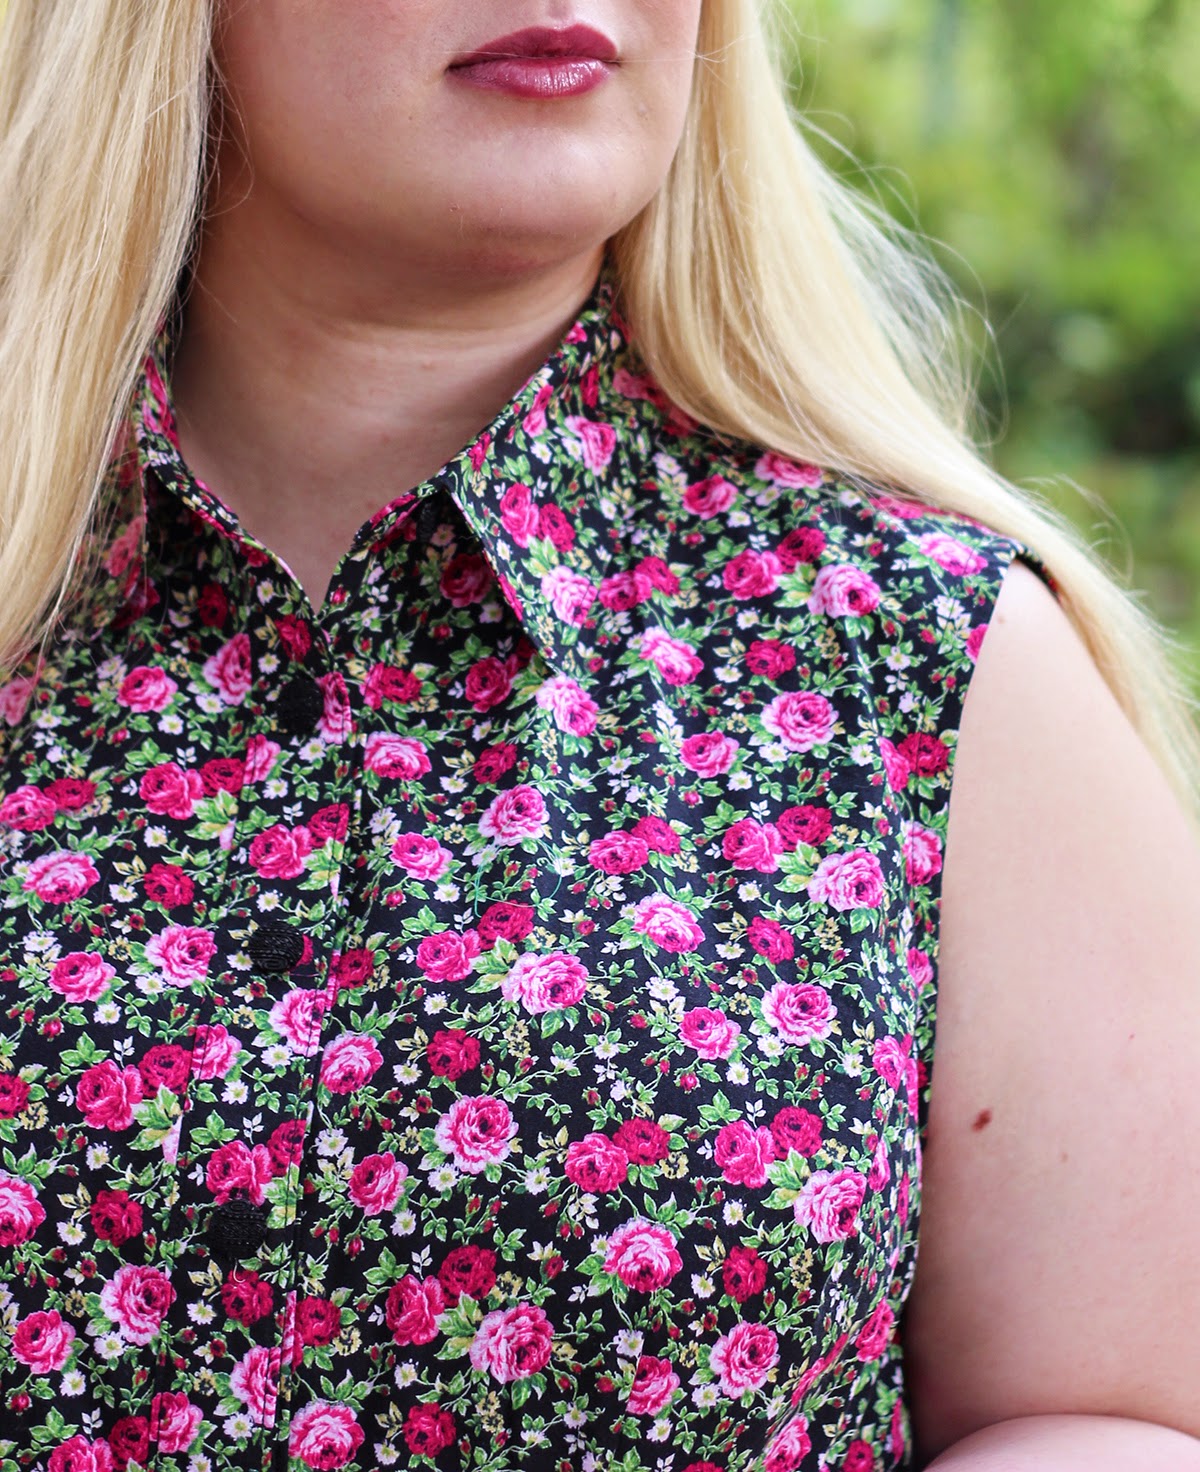
This therapeutic fabric, a pink rose print on black cotton poplin, was bought on Goldhawk Road during my last trip to London, in the summer of 2012.  I came back with an embarrassing twenty-one meters of fabric from that trip, but have only made two pieces so far. The other fabrics--all florals, of course--just sit in my closet, waiting for patterns tempting enough to bring out the scissors. After the success of my first 6696, I knew this one would be a worthy sacrifice. 

With three meters of 50'' fabric, I had barely enough for the full-skirted view of this dress. The back bodice and inside collar bands had to be cut in pairs, instead of cut on the fold, but neither change bothered me overly much. Even better, this fabric is impervious to fraying, which meant bringing out the pinking shears for the inside finish. Woohoo! I used to never pink things, but after snooping inside some handmade vintage pieces, I've come around on the simplicity of that finish. 


Elsewhere on the inside of the dress, I used pink cotton shirting for the waistband facing, yoke facing, and bias bound armholes. As is glaringly obvious from the dress guts picture above, I cut the bodice back on the selvage and left that finish alone. That pop of white inside might bother some, but I love the efficiency of using selvages, whenever possible. Plus, let's be honest, I have a soft spot for those damn dots. (This selvage dress remains the coolest thing ever sewn.)

The buttons for this project were cannibalized from my first Darling Ranges dress, which after one season became completely unwearable. The fabric not only shrank, but thinned out enough that, when my pocket caught on something, the whole right side ripped open. Sigh. Sam convinced me not to throw it out, during my last closet purge, insisting that I could probably use the buttons for something. Lo, behold! I still loved these decorative little black buttons and they were perfect for the femininity of this fabric. 

Construction on this dress was time-intensive, but pretty blissful. The fabric pressed and sewed beautifully, the collar turned perfectly, and it was exactly the sort of detailed project I needed. Once again, I top-stitched the entire collar, collar stand, and button bands, to avoid even more hand-stitching. After buying an edge stitching foot a few months ago, I'm a total top-stitching convert! I love the added detail and it's so, so much quicker than slip-stitching for hours.


The only real difference between this dress and my last 6696 is the fit. Instead of using the straight 22 D-cup bodice, then grading down to a 20, I used the straight 20 everywhere and performed an FBA. The bodice fit is just a bit better and required no after-the-fact dart manipulation. Huzzah! No one else noticed the bust blousing, but I was so happy to banish it. Additionally, I raised the armhole an inch, to prevent the dreaded bra peep. The fit is so spot-on now. Go Go Gadget Happy Dance! 

Incidentally, while I was sewing this up there were some pattern issues I realized didn't get mentioned in my original review. First off, there is a discrepancy between the number of belt loops you're supposed to cut and how many markings there are on the waistband. It says you need four, but you definitely need six: two on the front, two on the side seams, and two on the back. I checked the pattern line drawing and everything. Six, six, six! Additionally, the center marking on the collar band is not actually on center. This doesn't matter much, because you should always double check your center, before you sew anyhow. Make sure your two bands are in the same position up front, then you're golden. 

Hey Mary! Why is your hip-to-waist ratio so insanely large?
*turns to the side*
*Bootylicious mysteriously begins to play*


So, that's it! Another shirtdress. In case you're not sick of this pattern already, I just finished a third one for my Mood Sewing Network project this month. That maniacal cackling you heard was, indeed, mine. Autumn of 1000 Shirtdresses, I am in you!

Oh, and just one more thing...

MY DEFENSE WAS SUCCESSFUL!


This dress must be very good luck, y'all. The papers are signed, the fanfare has begun, and I'm officially Dr. Mary Danielson Perry. Thus the real nature of my radio silence around here. It wasn't so much the fortitude of my willpower, but the whirling frenzy of my revelry! I can't even tell you how happy I am to finally be finished with that process. Thank you all again for your good wishes! Sewing has been my outlet through the past few years and it means so much to have a community to share that passion with.

In other words, you rock and I love you all!

Friday, August 15, 2014

Miss Clara Goes Back to School: McCall's 6696


Good afternoon, lovely ones! Are you reveling in the aroma of newly sharpened pencils and, that most hallowed of after-school snacks, spiced apple pie? If so, color me jealous! Not only is summer still kicking here in Texas, but for the first time in 24 years, I am not headed back to school. Next Tuesday, I defend my dissertation and, if all goes as planned, write The End on my life as a student. Those final two degrees won't be conferred until December, but for all intents and purposes, I will be done done done. 

It seems only right that I go out in style, don't you agree? To that end, I made this schoolhouse appropriate piece: a classic shirtdress in reproduction feedsack cotton with a contrasting collar and buttons. Not only does this dress revel in the primary colors, but there were tons of fun skills to practice during its construction. How academically delightful!


First off, let's talk pattern, shall we? This is McCall's 6696, or as I like to call it: The Shirtdress of Joy and Wonder. For the last five years, I have hunted for precisely this dress pattern. Not only does it have a properly constructed collar (Huzzah for collar bands!), but separate waistband and button placket pieces, a wide pleated skirt, and a cup-sized based bodice pattern. It is a brilliant, thoughtful design, with nary a shortcut in sight. Perfectionists rejoice! 

But Mary, you ask quite reasonably, this pattern was released over a year ago. Why are you just now sewing it up, if it's the holy grail of shirtdress patterns? Surely, if you were that excited about it, we would have seen 100 versions already. You're not exactly known for restraint, Blondie. 

Well, kittens, it's simple. I'm a lazy, lazy seamstress. Sure, I loved the idea of those eleven perfect buttons and hand-sewn facings, but that shite takes time.  Nowhere during all the hubbub of wedding plans and schoolwork did I feel like devoting so much time to one dress. Why make one perfect shirtdress, when I could make four perfectly fine sundresses? Slowly, that phase of delusional laziness passed, however. 

This week, I made a shirtdress.

This photo is not just to show me staring off into space, contemplating the mysteries of life.
 Check out that print up close! So cute, right?
Well, I made a wearable muslin of a shirtdress anyhow. 

In my wise older years, I've become a devotee of legit muslins, but for shirtdresses, I really like to see how everything hangs with buttons and interfacing complete. So, I tissue fit the bodice and reached for a cute cotton fabric. This feedsack reproduction print was one of the first pieces of fabric I owned. In a moment of crazed generosity, my mother let her newbie seamstress daughter steal it away. It's a miracle this fabric wasn't sacrificed to incompetency in those early days. Many of its compatriots were not so lucky. 

This fabric is definitely a quilting weight. Though it has a nice drape and is soft to the touch, it's also pretty weighty and takes pressing beautifully. For unlined dresses like this one, I actually prefer such fabrics, as they can stand on their own. I have way too many cotton lawn dresses that don't get worn, because when unlined, they feel like nighties instead of real clothes. 


As for the pattern, I really enjoyed sewing this one up. I absolutely love all the skills that go into a shirtdress, especially collar and button placket construction. As long as I'm not rushing through, it's such a calming, rewarding process. From cutting to buttons, this took me five days to complete, with about twelve hours of sewing total. 

Of course, I didn't do nearly the amount of hand sewing instructed in the pattern. This pattern has you hand-stitching the collar band, button placket, waist facing, and yoke facing down for an invisible finish. That's all fine and dandy, but I love top-stitching on shirtdresses. It's so much fun! So not only did I forego a yoke facing entirely, but I top-stitched the entire button placket and collar construction. The waistband facing and hem were the only two things catch-stitched by hand. Which just proves I can't follow instructions at all, because the hem was supposed to be top-stitched. Rebel seamstress cannot be tamed! 

The order of operations on this dress was actually way interesting, y'all. Instead of hemming the button placket and dress together, the dress hem is finished halfway through construction, before the placket is even added. So, if you're planning on hemming the dress less than its prescribed 2 inches, know that the placket piece will need lengthening. Otherwise, this was totally straightforward! Other than top-stitching, my only other major process change was to use Andrea's collar construction technique, which I highly recommend. 


Fit wise, this dress was a total experiment. The pattern claims that, using the different cup size front bodice pieces, that I could achieve a perfect gap-free fit. Tissue fitting seemed to prove that claim out, so I graded from a 20 at the shoulders, to a 22 D-cup bodice, back to a 20 for the waist and hips. (My current measurements are 46-34-45.) This was a wearable muslin, after all, so why not test the road without an FBA?

Y'all, I'm flabbergasted. I am going to take some tweaks next time around, but this is an astonishingly good fit for a pattern straight-from-the-envelope. I lengthened the dart about an inch, after my final try on, but that's the only fit alteration taken here. There is a little bubbling at the dart tip, shown in the close up below, but a bit of flat pattern reshaping should fix that in future versions. Originally, the darts ended way, way, way before the standard 1-inch from bust apex, which is what's causing that. Even with the lengthening I did, they're maybe a half-inch too short. Honestly, I might size down to a 20 and do a standard FBA next time, because I'm persnickety like that, but the dart will still need lengthening in that version. 

If you're new to fitting adjustments, however, and still haven't mastered the FBA, this is definitely a pattern to explore. With the multi-size cup options and a little dart tweaking, D and DD women should be able to get a pretty nice fit with this pattern. That's such a lovely accomplishment in a shirtdress, especially if you're used to the gaposis of RTW sizing!


In the end, this was exactly the dress I'd dreamed of. The waistband nips in perfectly and I love the belt carriers, whereas the skirt has a lovely, gentle flare. Best of all: no gaping button band! Huzzah!

Pepare yourselves, friends, because this will probably be The Autumn of 1000 Shirtdresses. McCall's 6696, you are my sunshine. Well, in addition to Sam, who is my main sunshine and who will actually be getting collared shirts of his own next week. Amazing, I know...

The Details

Things I Loved:
  • The collar! They may be more fiddly, but the classic collar construction of a placket band, collar band, and main collar looks so much better than the shortcut alternatives. 
  • The buttons! My love for sewing buttons and buttonholes knows no bounds. They're so cute and so much fun!
  • The length! At 5'8'', it's rare that a pattern hits me in exactly the right spot, but this just-below-knee length is perfect. 
  • The pockets! They're a little shallow for my taste, but constructed in a way that binds them to the waistband. No flapping about here!
  • The self-bias armhole finish! Always such a cute detail. 
  • The waistband facing! It's so fun to see the right side of the fabric on the inside, for a bit of contrast.
  • The back! Some people haven't loved the amount of blousing in the back bodice, but it didn't bother me at all. I suspect that in the larger sizes, this is a less noticeable effect. 
Things I Changed:
  • Lengthened the darts by an inch, for a better fit. 
  • Omitted the yoke facing, because this is a wearable muslin and my heart just wasn't in that detail. 
  • Top-stitched the button placket, collar, and collar stand, instead of hand-stitching them.
  • Hand-stitched the hem, instead of top-stitching it. 
Things I Will Change, Next Time Around:
  • Alter the fit a bit more. I will conquer those darts! 
  • Add the sleeves, which are a very classic length. 
Tips & Tricks:
  • Once again, I cannot recommend Andrea's collar tutorial enough. I initially had planned to go by the book on this one, but chickened out at the last minute. Her order of operations is so sensible! 
Notions & Fabric:
  • 3.5 yards of main fabric
  • 11 navy buttons
  • 1/2 yard of navy twill for collar

Construction Time:
  • 12 hours


Fun fact: The buttons I chose are crazy slippery! As a result, I spent half the time taking photos of this dress with one button unbuttoned. This picture is one such victim. 


UP