Sunday, December 14, 2014

Miss Clara and the Seasonally Inappropriate Christmas Dress: McCall's 6696


When planning a dress for the holidays, a certain aesthetic comes to mind. This is the season for plaid taffetta and long-sleeved wool sheaths. This is, most assuredly, not the season for lightweight poplin printed with hot pink roses. No Northern Hemisphere woman in her right mind would sew such a thing right now. 

Except, apparently, me.

I couldn't help myself. While musing on Christmas dresses, this Liberty cotton lodged itself in my mind and wouldn't budge. I've hoarded four yards of this poplin, in the pink Carline print, for years. Not only is this my favorite Liberty print, but it's also maddeningly discontinued. I have another two yards in blue, awaiting the perfect blouse pattern, and an Ebay alert set up for the red colorway. Carline is my fabric white whale. 

This particular length was bought with a shirtdress in mind. Of course. Since then, McCall's 6696 has come into my life and my collar-making skills have improved tenfold. Not only would this be an ideal Christmas shirtdress, I decided, but I probably wouldn't ruin it in the process. Score! It was time for Carline to have her day. 


True to form, I couldn't leave well enough alone. Heaven forbid, I take the easy way and make an unaltered, perfect-as-she-is 6696. That would be too easy, too stress-free! Instead, I decided to turn my beloved shirtdress pattern into a half-shirtdress pattern. I would use the bodice of 6696, paired with a straight waistband, full, gathered skirt, and side zip closure. 

Despite my dramatics, this is actually a straight-forward pattern change. There was some basting involved, to get the waistband just right, but otherwise, it's a simple matter of planning. Let's walk through it, shall we? Note: I didn't set out to make this a tutorial, but rather a guideline of my process, so this isn't a fully photographed explanation. Writing it out, the instructions ballooned in size. I explain everything thoroughly, however, and photographed the two weird parts. If you have any questions, leave them in the comment section!


1. Cut both skirt pieces on the fold. I decided to use the original skirt pieces from 6696, but gather them like a traditional dirndl skirt. You could, similarly, cut two rectangles for a real dirndl skirt, as in Gertie's tutorial. Either way, since we're moving from a front button closure to a side zip, you're going to cut those skirt pieces on the fold, so that you don't have a seam running down the front.

2. Trace a new button band. For a half-shirtdress, you only want a button band the length of your bodice pieces. So, measure the length of your bodice center fronts, then mark that length on your button band piece. Trace that portion of your band and--voila!--new bands.

3. Measure your waistband. Your impulse for this project will be to add the length of your button band to your original waistband, to create a slightly longer one. This is actually not the way to go. Full shirtdresses have more ease around the waist than a half-shirtdress, to prevent button gaping. How much ease you want at the waist will be up to you (standard is 1'', but I prefer 1/2''), but it's likely that 6696's waistband will work as-is, without lengthening. Put the pattern piece around your natural waist and try it out! Does it feel comfortable, when you sit? Is it secure enough to add definition? Add or subtract length, based on this decision, and remember to factor in a 5/8'' seam allowance on each end.

4. Mark side seams and centers of waistband. Because we're gathering our skirts in, you'll need to mark your center front, center back, and side seams, so that your skirt is even all around. Begin by adding your seam lines to each end at 5/8'', then measure in from one end at 1/4th the length (Center Front), 1/2 the length (Side), and 3/4th the length (Center Back) between those lines.

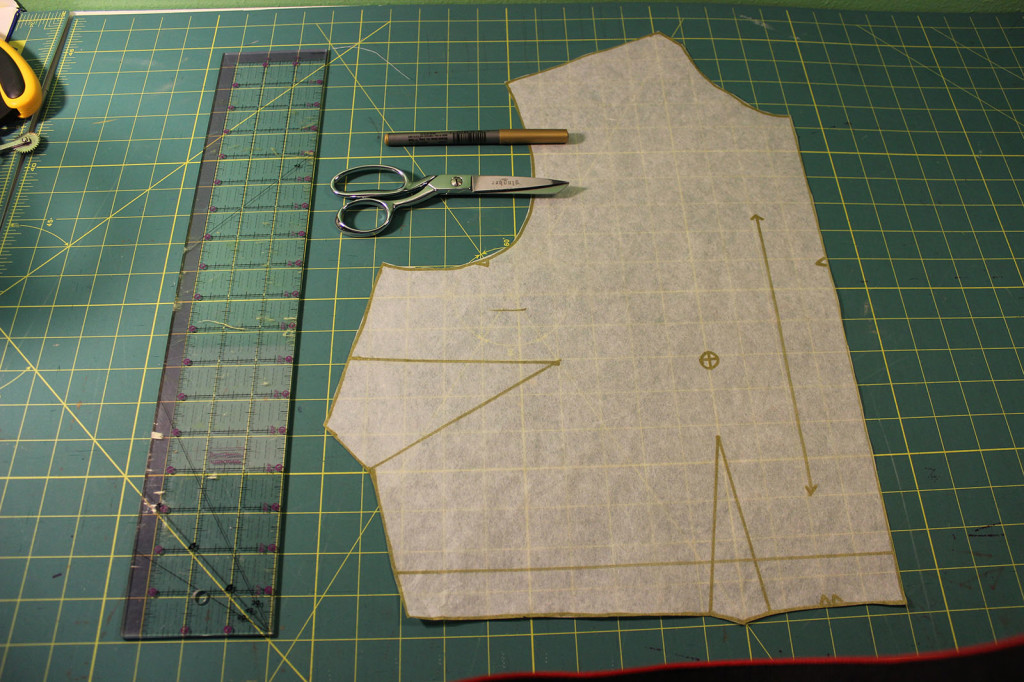
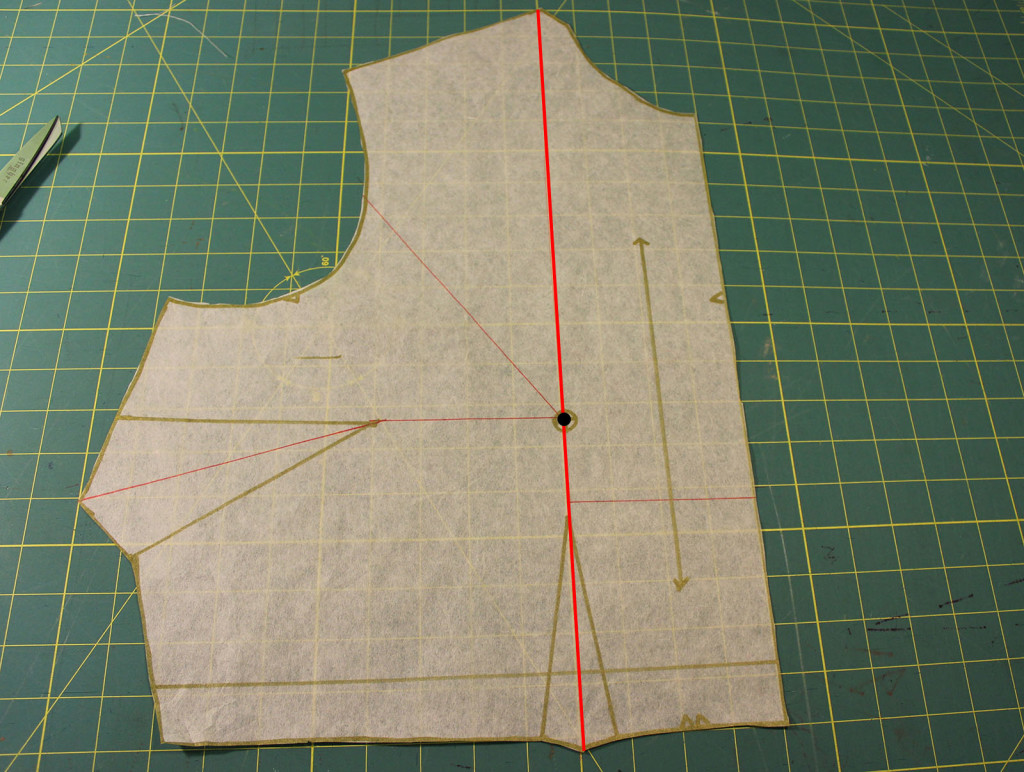
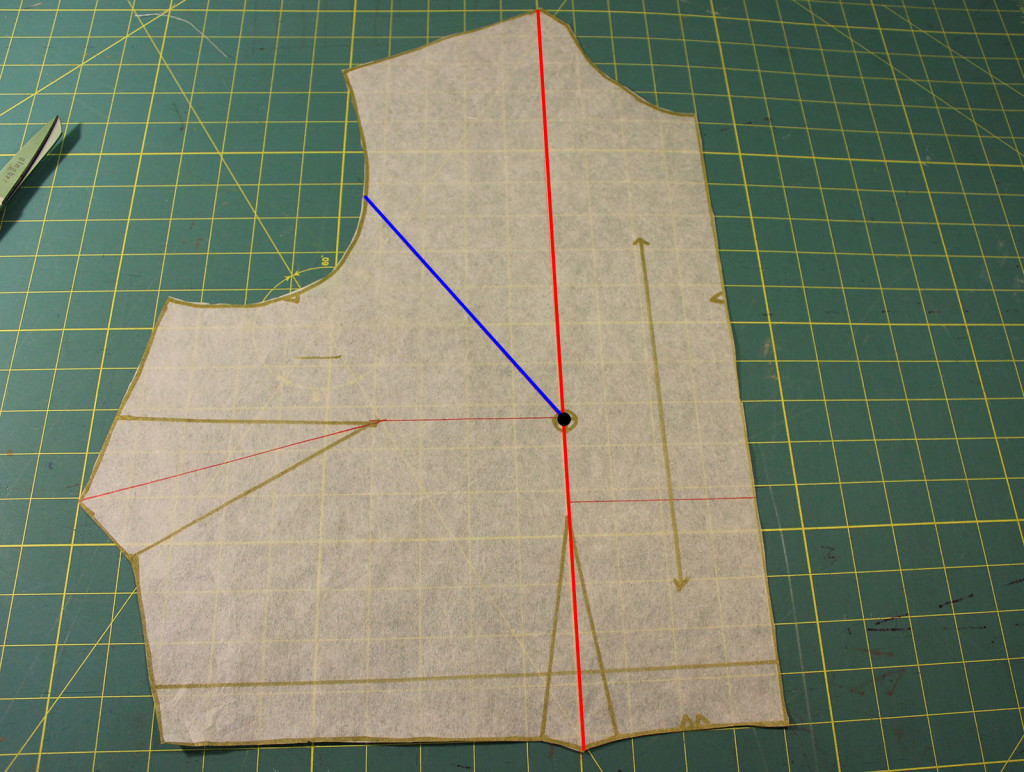
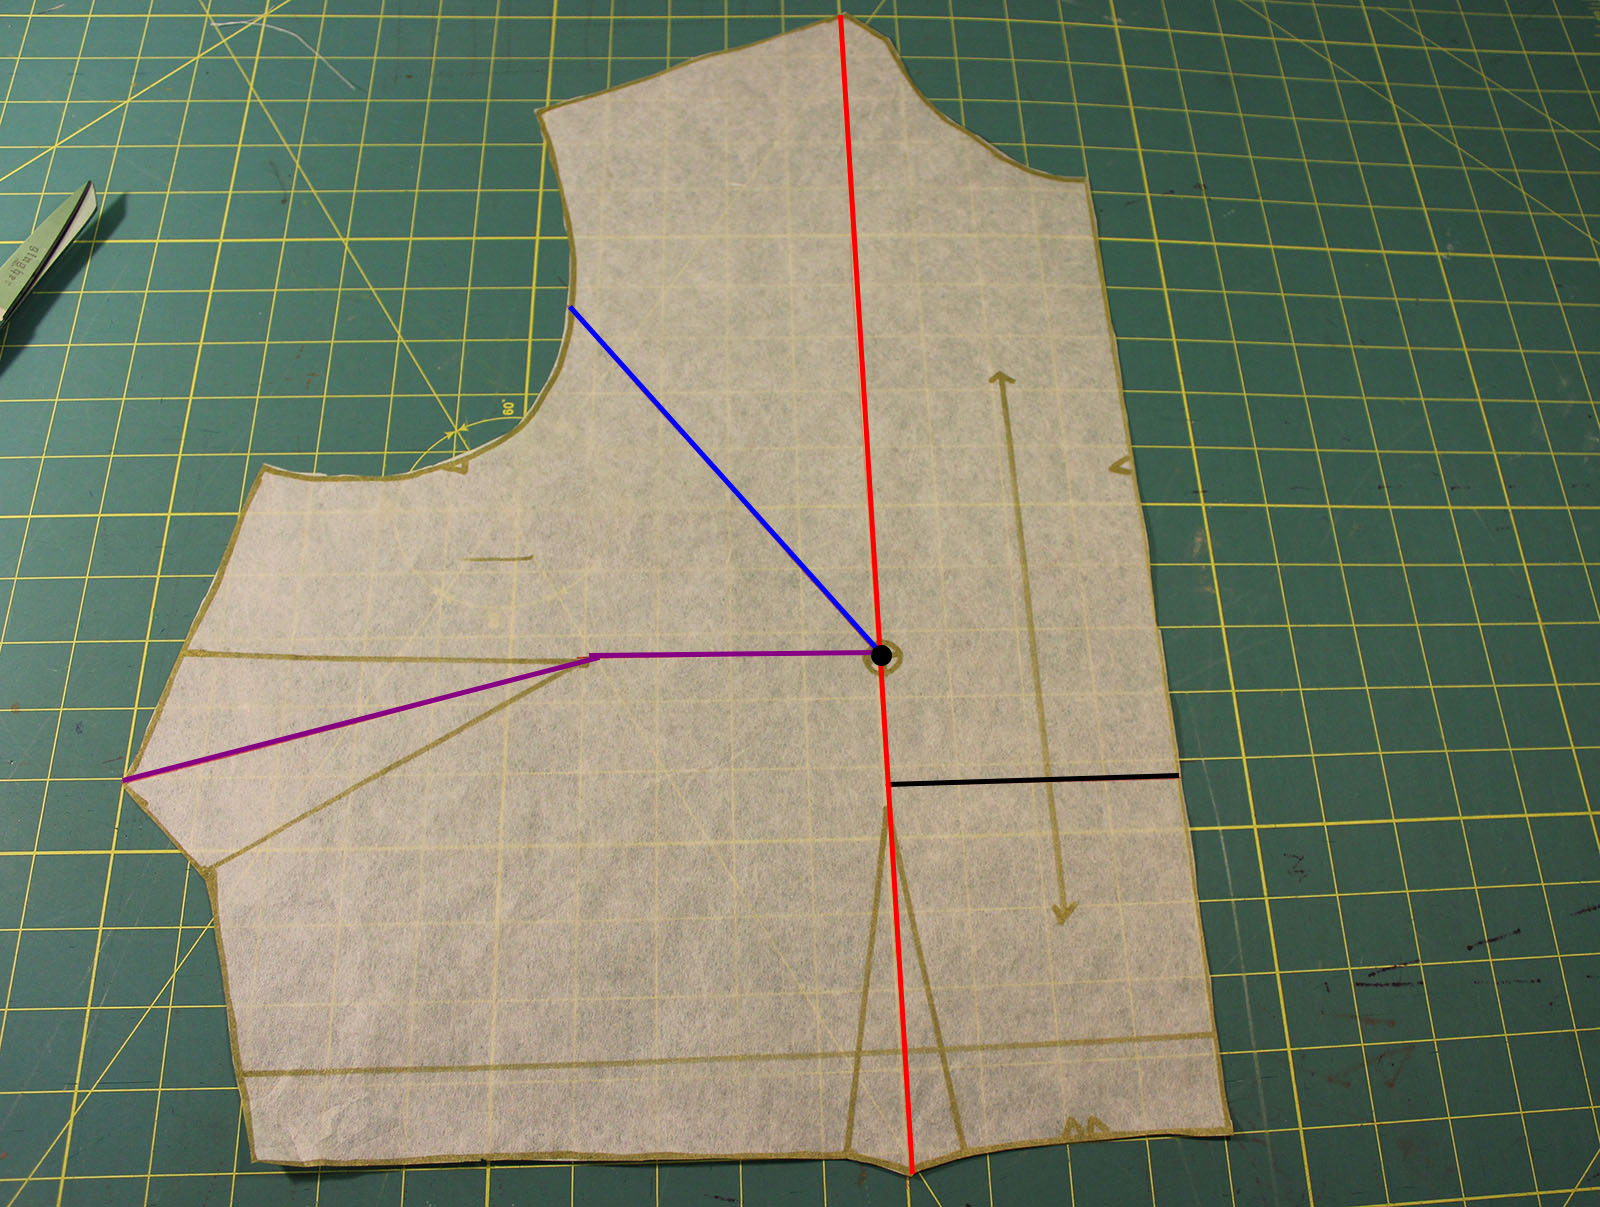
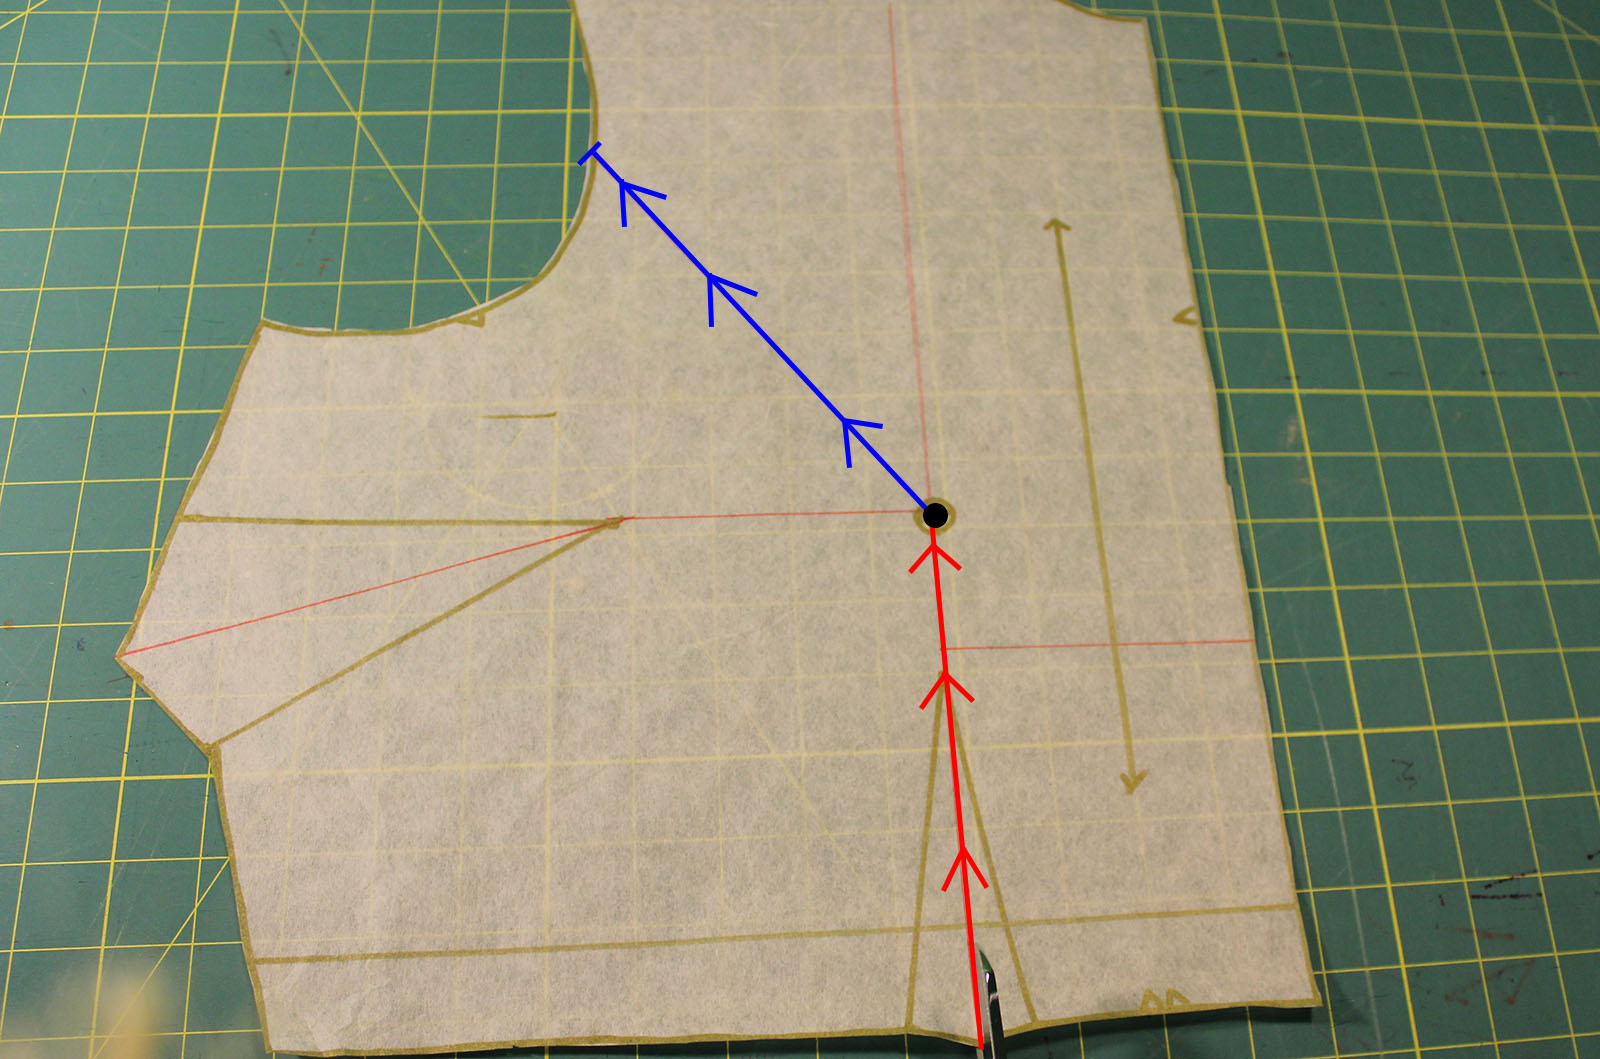
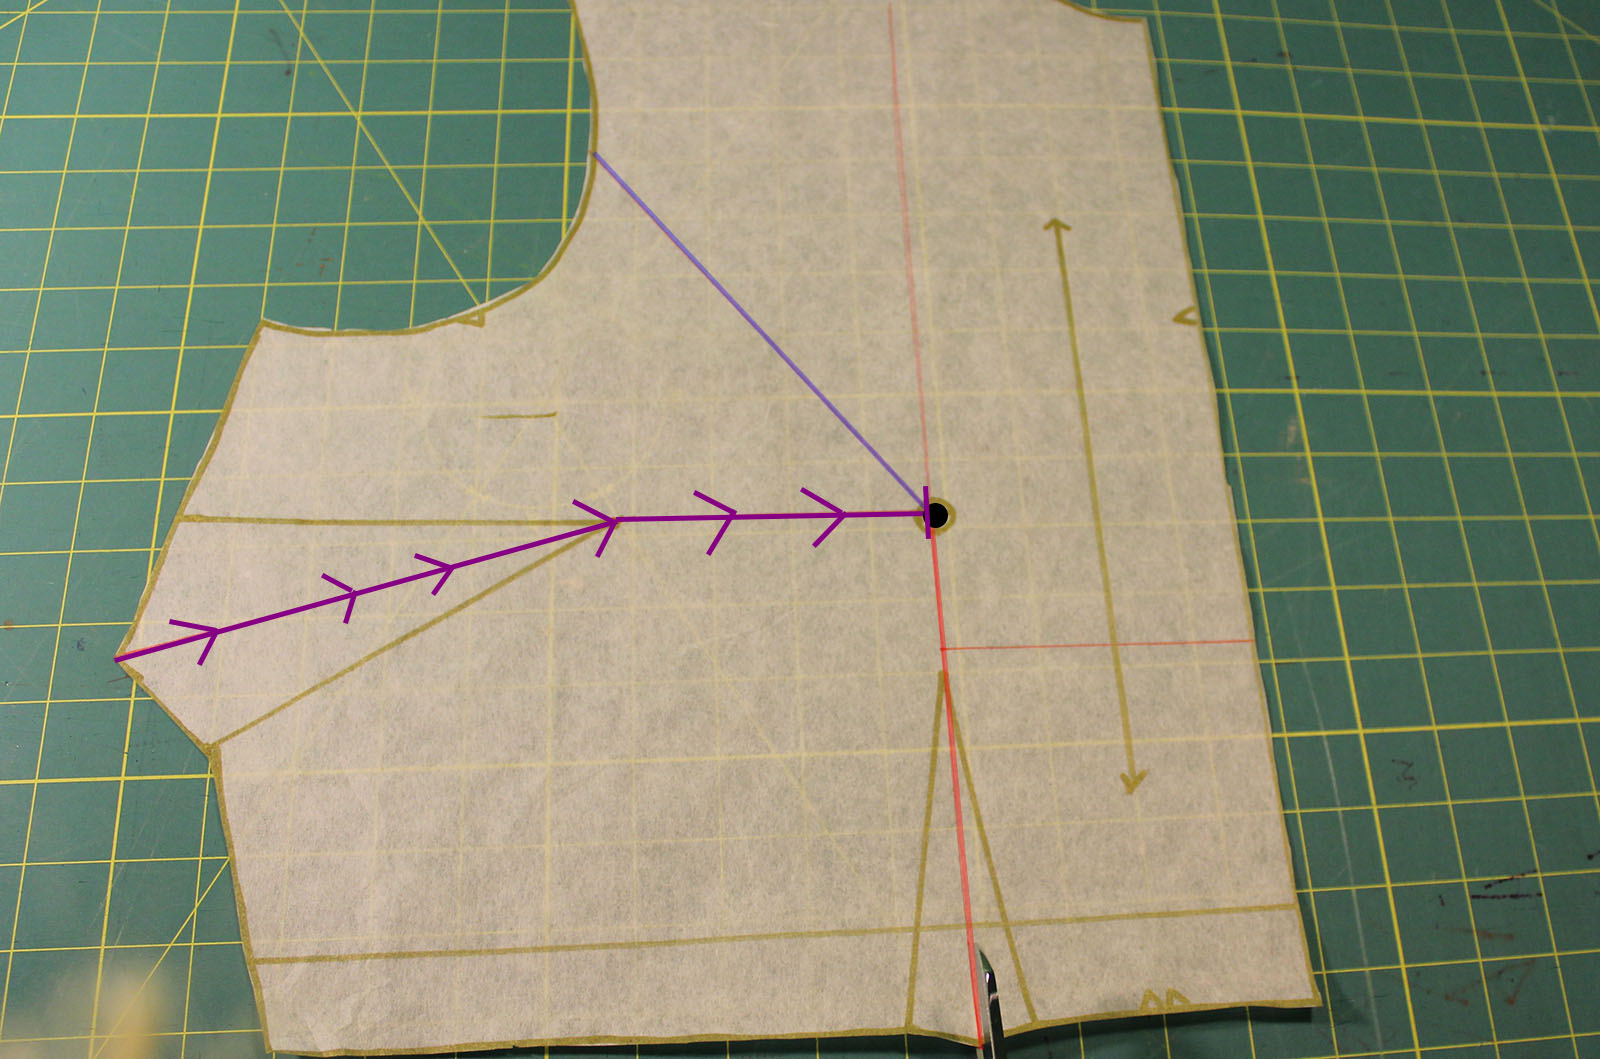
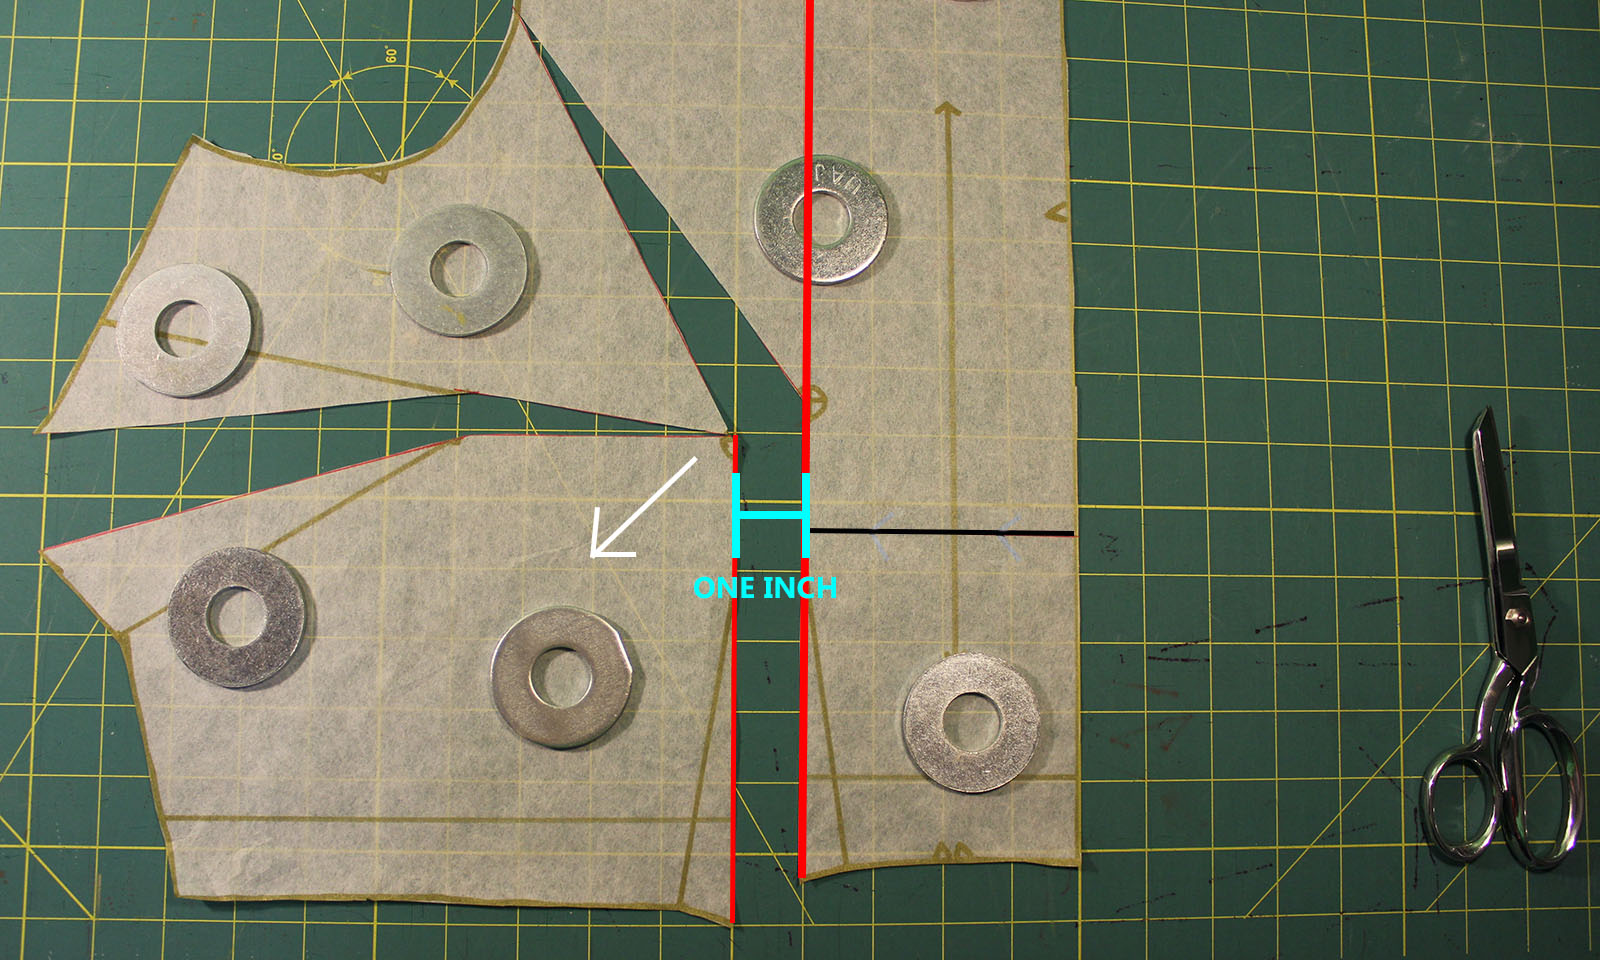
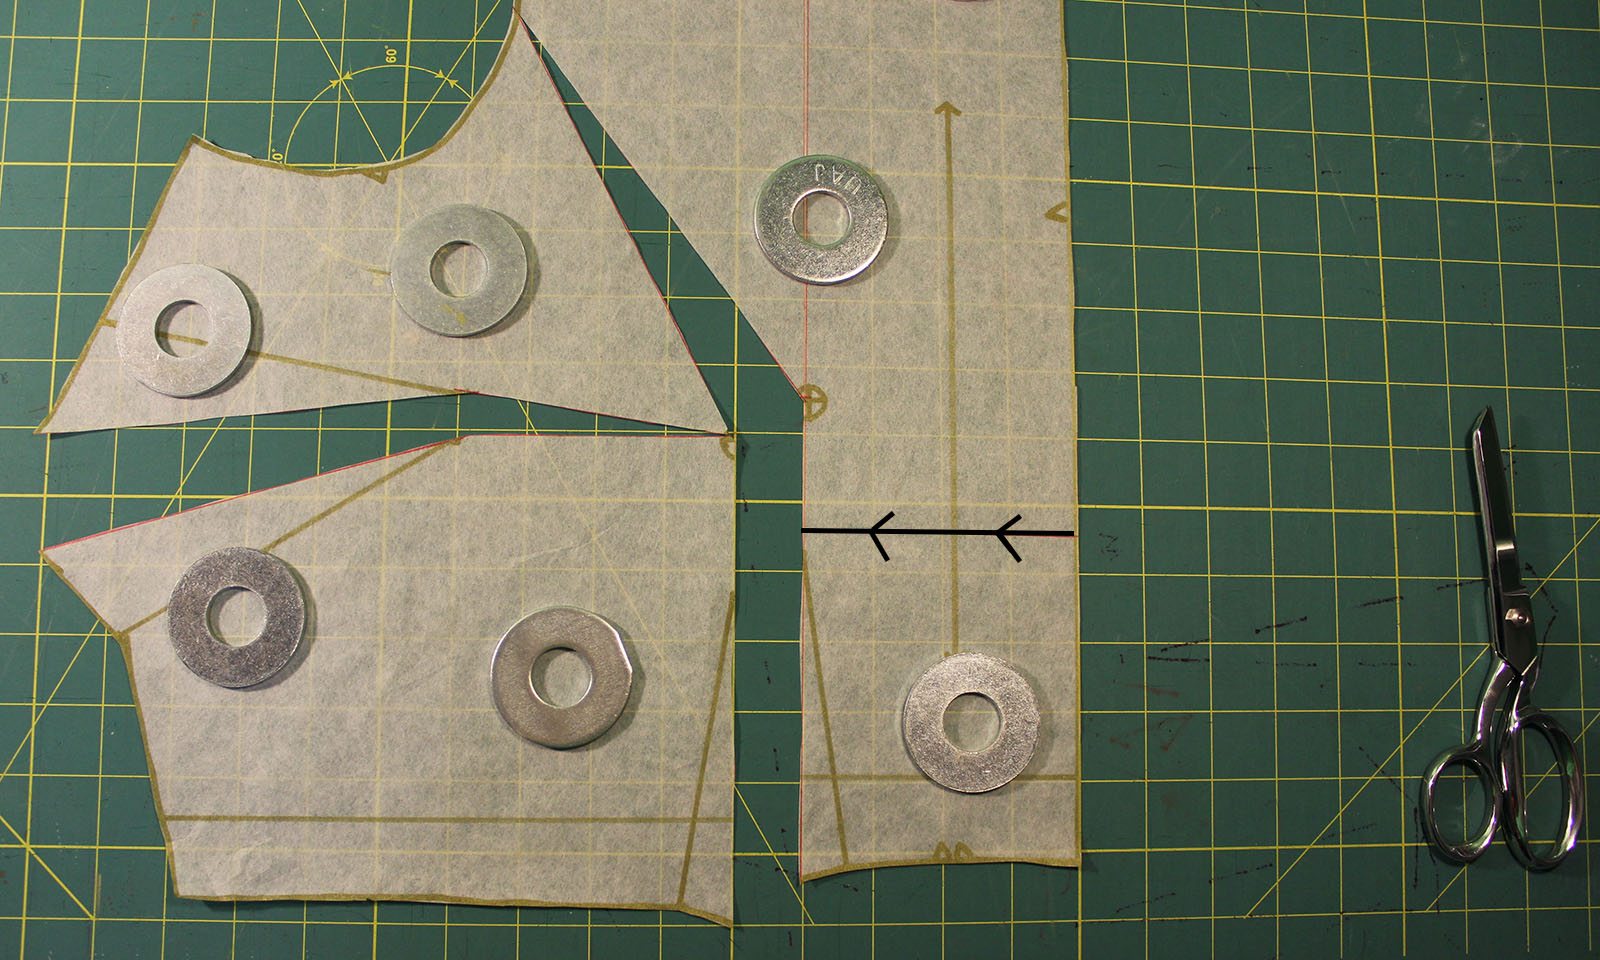
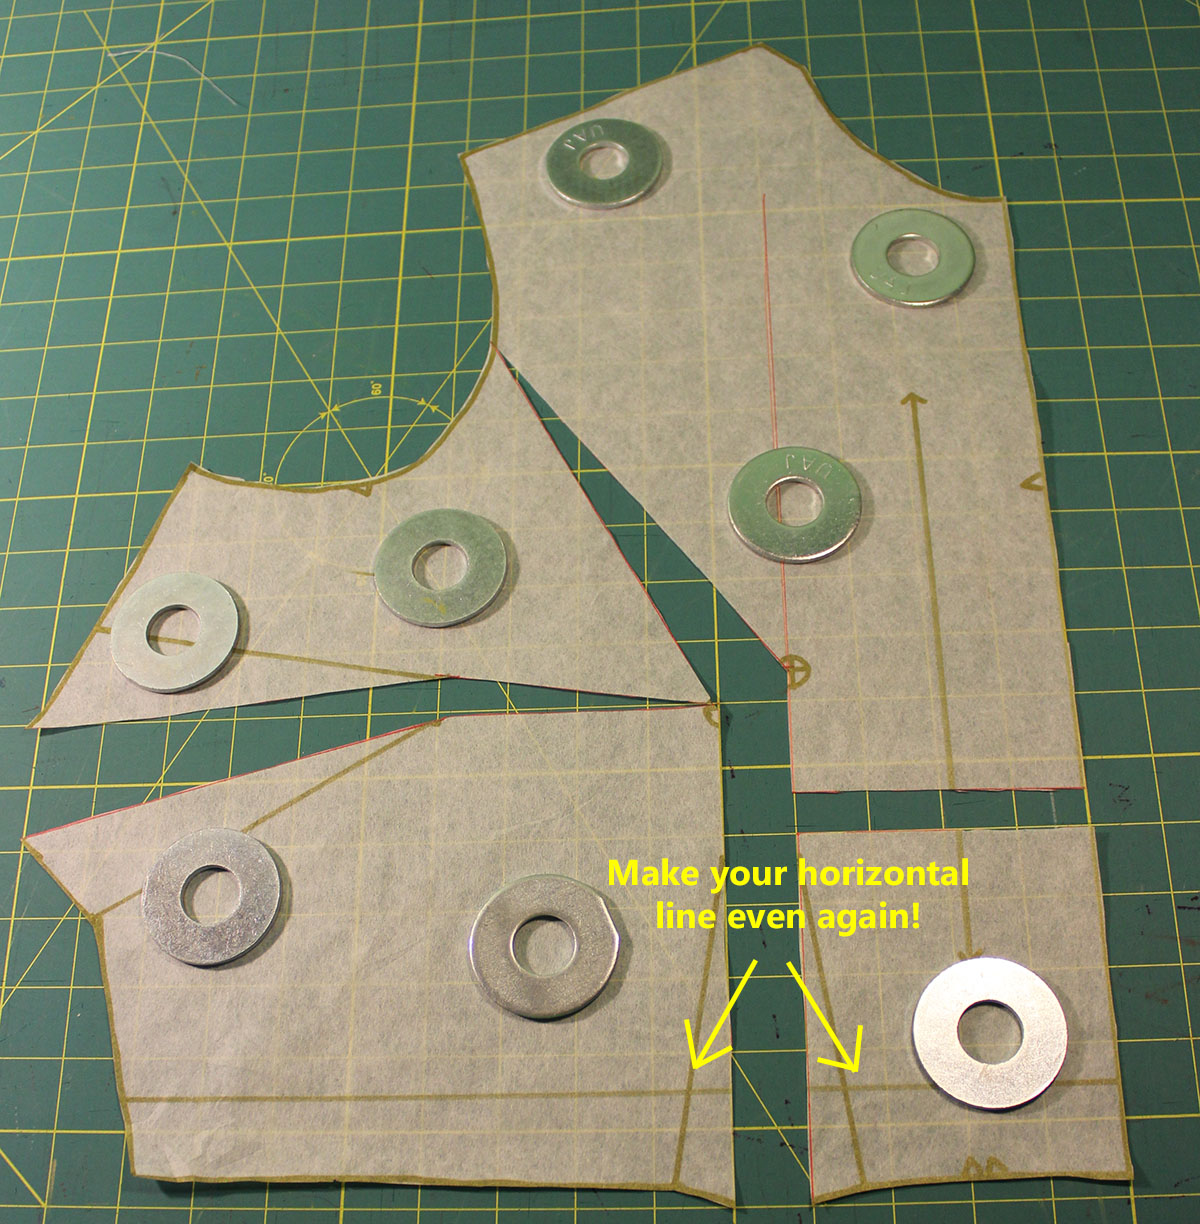
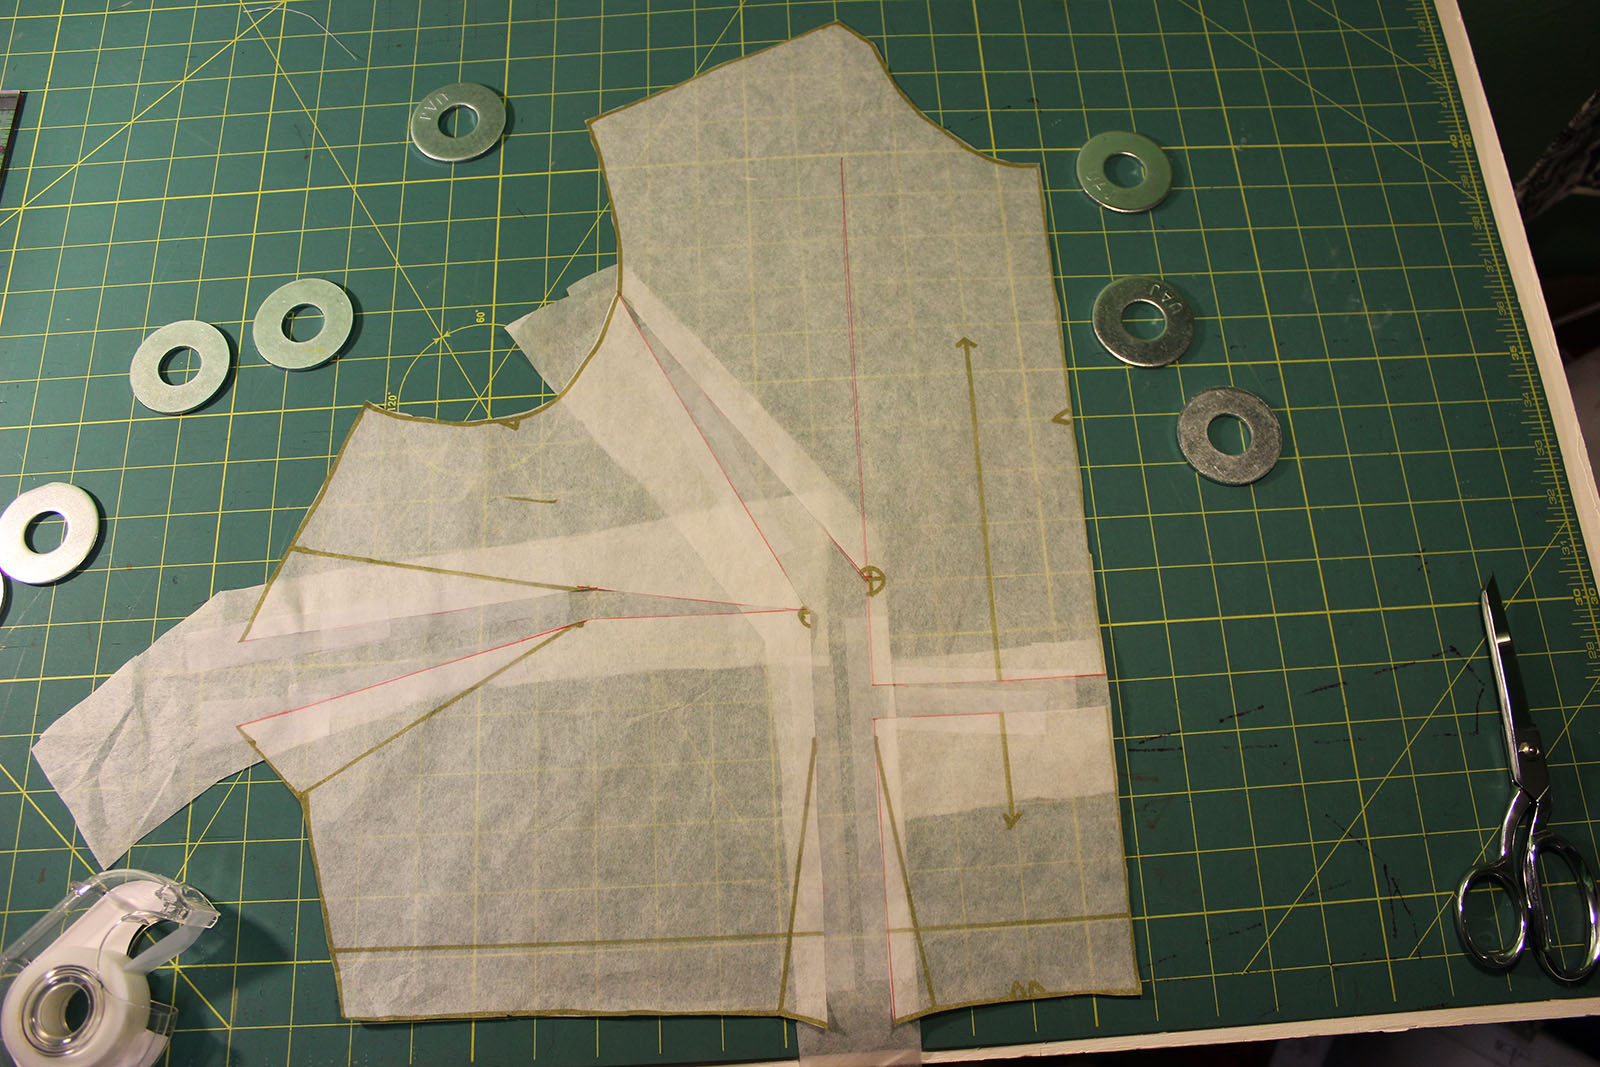
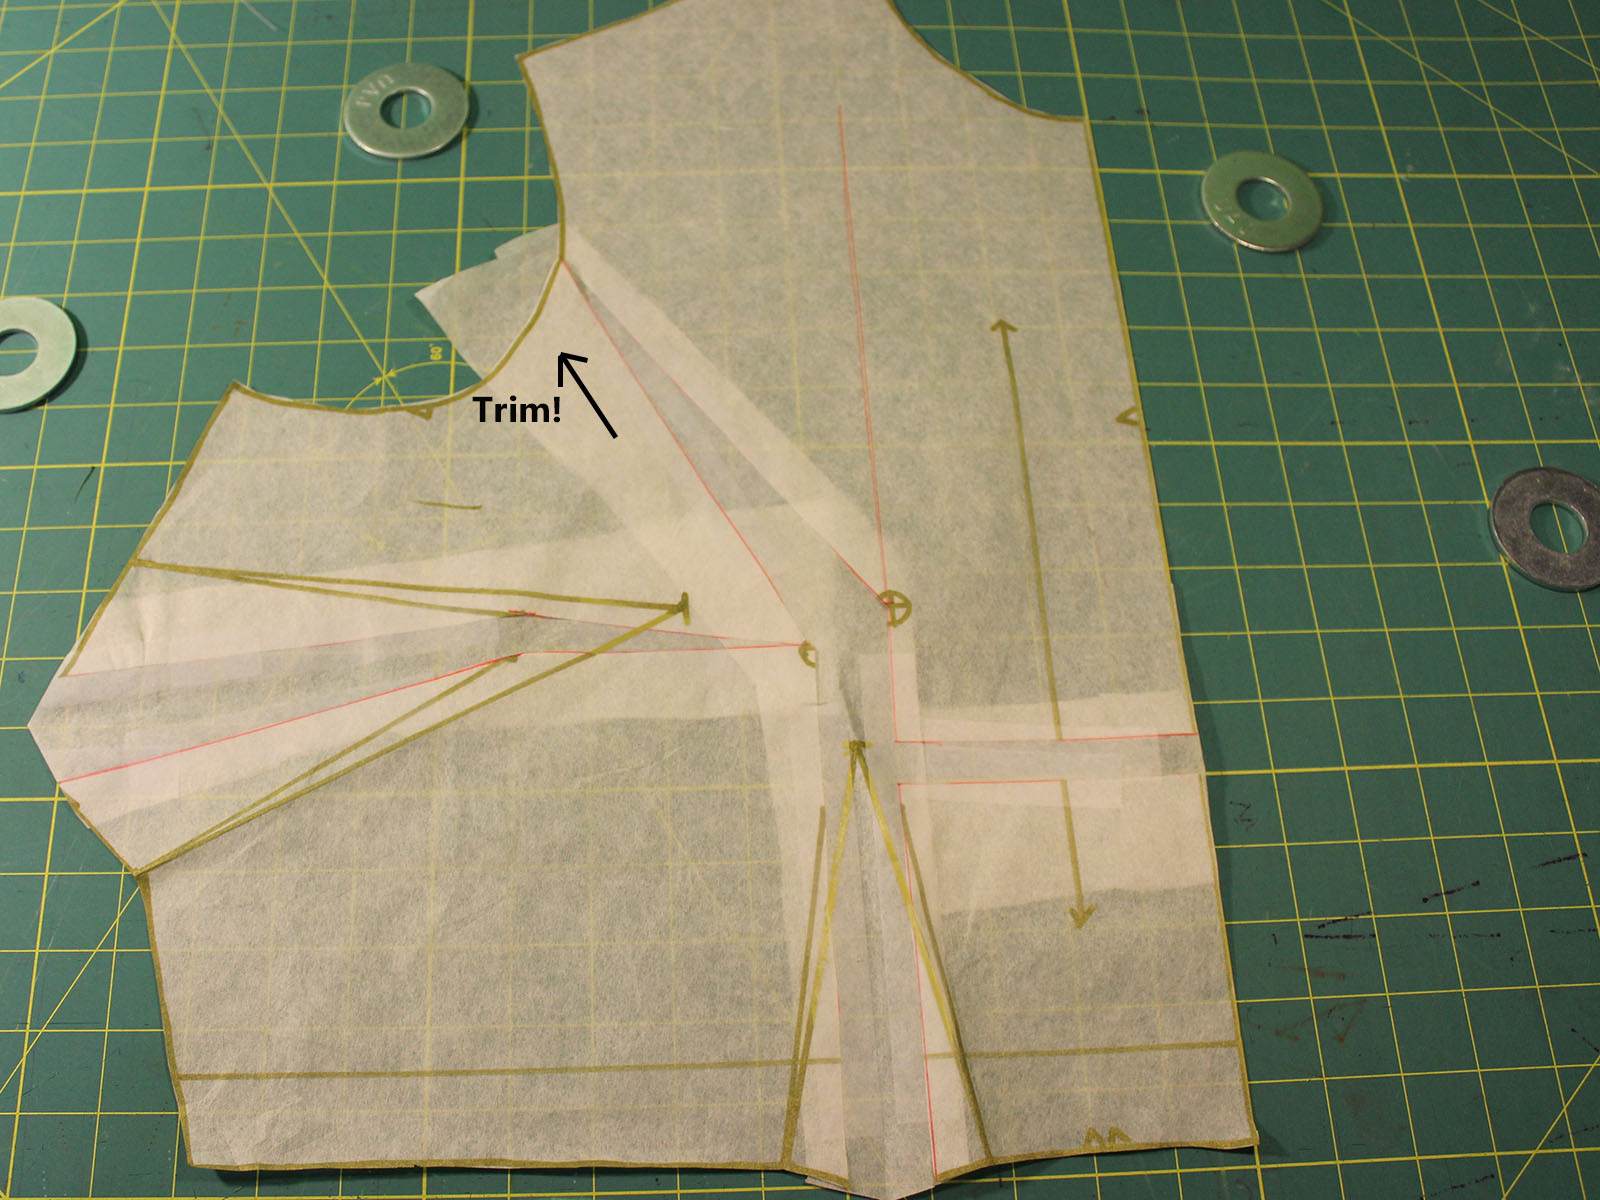
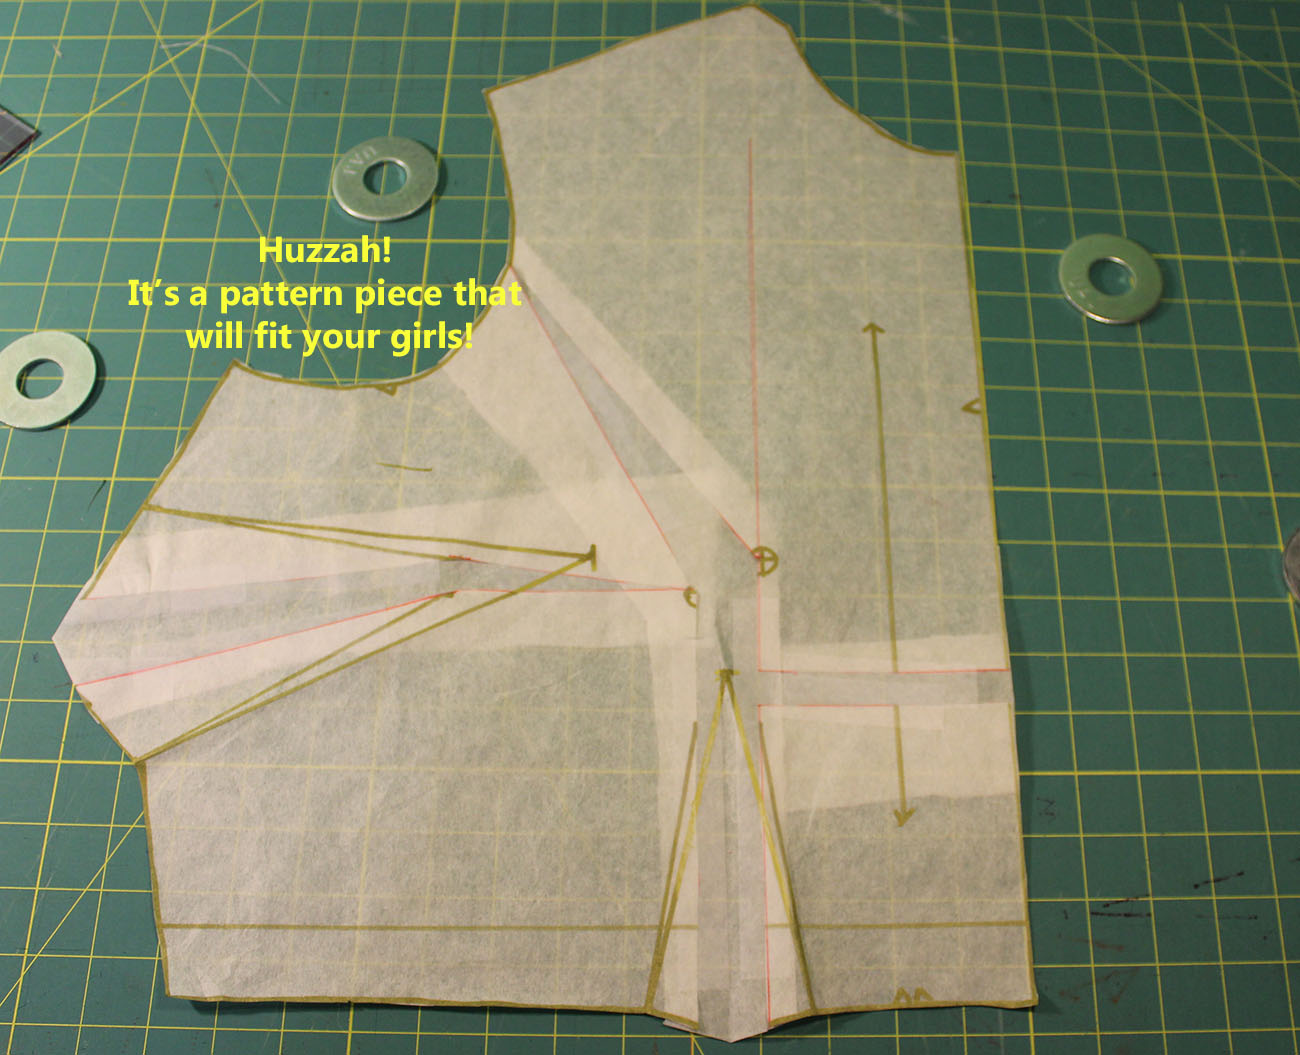
5. (Optional) Reduce gathers on back bodice. While the blousing in the back of this dress doesn't bother me, you may want to streamline the back in this version. To do so, simply trace the back bodice piece, then remove your desired amount from between the center gathering marks, in a vertical strip from top-to-bottom. I recommend leaving some gathers in, for ease of wearing, but removing one or two inches from the pattern piece will lessen that blousing quite a bit.

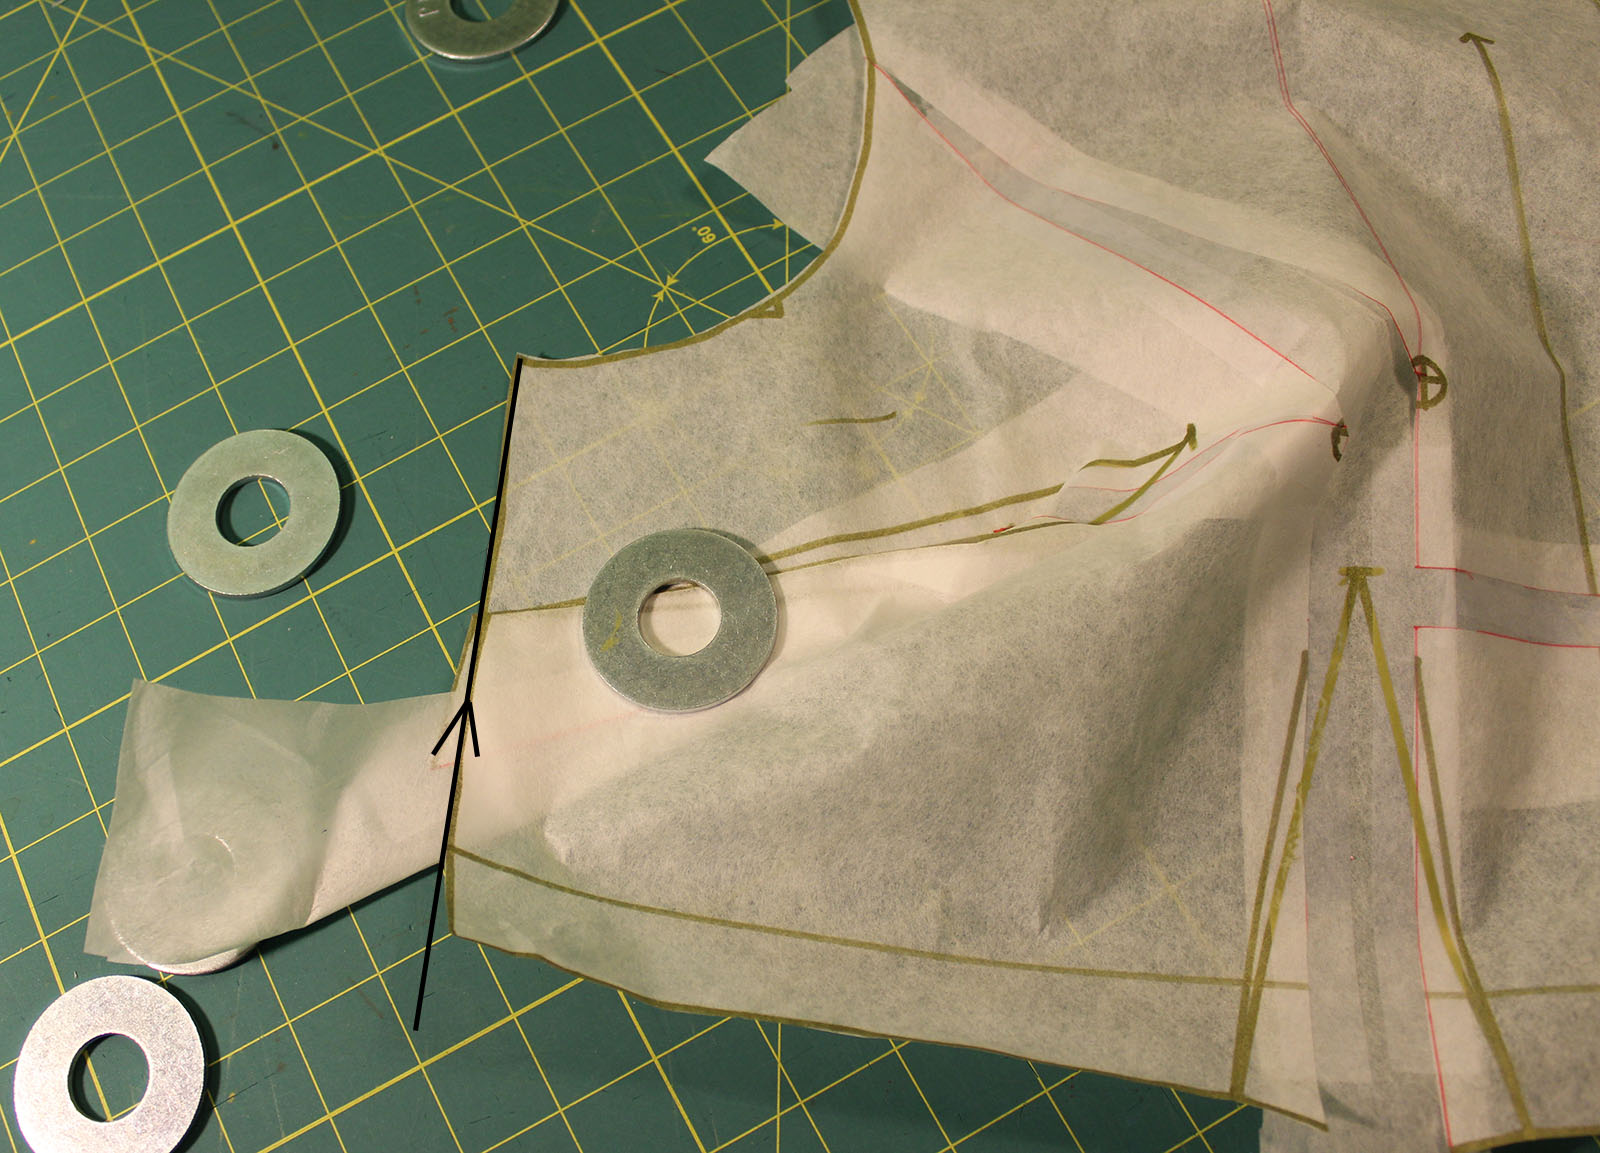
6. Leave the left side bodice open, 3.5 inches from top. We're going to insert an invisible zipper on the left side, so construct your bodice normally, but only sew down part of that side seam. There's no exact science to this, but it should be enough that you'll be able to get into your dress comfortably! Remember to back-stitch, at each end. Construct and finish the rest of your bodice, as usual. 

The left side of my bodice, after leaving it open. 

7. Add button bands, then overlap the right bodice onto the left bodice. After sewing your bodice as you would normally, attach your button bands! Once you have them on and top-stitched, put the right bodice over the left bodice, lining up the bands, then baste them into place. Finish both the collar and the sleeves now. Leave the buttons and buttonholes until the end of dress construction, so you can accurately mark placement, with the skirt attached.

8. Sew the waistband to the bodice. Begin pinning with the left side, still leaving that open, and pin your waistband to the bodice. Align the centers of your front and back bodice, with the marks on your waistband, then baste them together. If you're happy after a fit-check, then sew everything in permanently! Note: you may find that you want to take the waistband in further at this step, or even raise it a little. The proportions of a half-shirtdress are just a bit different from a full, so these changes are natural. 

Overlapped bodice bands attached to the waistband. 

9. Sew the right skirt seam. We're still leaving that left side open, so sew and finish the right skirt seam only.

10. Gather and attach the skirt. Sew two rows of gathering stitches, at 1/4 inch and 1/2 inch, around the entirety of the skirt waistline. Once you've sewn, push along these lines and create your gathers. Match the skirt center front, center back, and side seams to those of your waistband, and even out the gathers across the skirt. Stitch into place. 

11. Insert an invisible zipper. Finish the entire left side of your dress, from bodice to skirt, using your preferred finishing method. (I serged everything, for simplicity's sake.) Then, insert the invisible zipper into the left side, with the top zipper stop aligning with your fabric opening. It's just like sewing an invisible zipper in a skirt or a dress, but the top zipper tape is going into an existing seam. Conversely, you can choose to leave the top left side entirely open beforehand, closing it only after your zipper installation. Either way, make sure your waistbands line up, and have at it!

Resulting invisible side zipper and a peek at my light pink bias tape armscye finish!


12. Sew the left skirt seam. Once your invisible zipper is in place, sew the remaining skirt side seam, below the zipper. Secure the bottom zipper tape into this seam, with a few hand stitches.

13. Buttons and hem. Add your buttonholes, buttons, and hem, as usual!

14. Dance a jig, in your new half-shirtdress. 


Of course, you could also just use an existing half-shirtdress pattern. There's the new wrapped half-shirtdress from McCall's, M7081, and the Lisette Traveler Dress from Simplicity. I didn't use either of these, because the McCall's was just published last week and the Traveler doesn't have a traditional collar construction, which drives me crazy. I figured, the 6696 already fits in the bodice, so why not go with the one I already love? A good design alteration is creatively exhilarating, anyhow!

It's okay to just nod at me, as if I've gone mad. You should use an existing pattern, if you've got one stashed away. 

Apart from the construction techniques above, there are a few little extras in this dress. As is my wont, everything is top-stitched, including the button bands, collar, collar stand, and the waistband. Not only does it cut down on the hand-stitching, but it adds a bit of definition to the busy floral pattern. The armscyes are finished with light pink single-fold bias tape, which goes with the palette nicely. I was going to make self-fabric tape, but couldn't bring myself to waste the Carline. I actually have just enough of this fabric leftover to make a sleeveless blouse. Joy!

The buttons on this lovely are jade green plastic, from Hancock's, and match the green of the rose leaves exactly. Honestly, y'all, as much as I love Carline, those buttons might be my favorite part of this dress. They glow like little emeralds against the rose pattern, don't they?

Of course, I'm wearing this dress with my favorite emerald cardigan right now. It's been pretty mild lately, but things are going to turn chillier this week! We're actually headed to New Orleans next weekend, to spend the holiday week (and our first anniversary!) there with my family. It's not a Danielson Family Christmas, unless we're in some far flung location, eating Chinese food and using a coat stand as a tree. What can I say? We're heathens, the lot of us. 


Friday, December 12, 2014

Miss Kimberly Paints in Watercolors: BHL Kim Dress


Perhaps I've watched Indiana Jones too many times, but I'm a big believer in the quest. Whether it's hunting down just the right Christmas present for Great Aunt Myrtle, or searching for the perfect set of long-lasting, colorful pens (Ahem: Triplus Fineliners), I love a good mission! To that end, I'm often sewing with a quest in mind, trying pattern after pattern until discovering my platonic version of a garment. I've found the classic shirtdress, conquered the A-line skirt, and--most recently--sewn the perfect party dress.

That last one really shouldn't have been so difficult! Yet, as a plus size woman, party dresses have forever been the thorn in my sartorial side. Your ready-to-wear shopping experience may differ from mine, but buying basics isn't that much of a trial for me. It still sucks, admittedly, but I at least have success. If I'm going to buy RTW, I know that Loft carries my favorite jeans, Talbot's stocks the coziest sweaters, and Asos Curve produces my favorite coats. Fancy dresses, however? I have no go-to. Inevitably, dresses for plus size woman are boring shifts, overly embellished horrors for mothers-of-the-bride, or ill-fitting polyester disasters. It was shopping for a party dress that led me to sewing, in the end. I just couldn't take one more bout of shopping for something pretty and ending up with another black dress.

Nowadays, I sew a ton of dresses, as you know. After years of settling for mediocre RTW pieces, I can't get pretty fabrics and floofy silhouettes out of my head. Every time I put a handmade dress on, it's striking a personal victory against the body-shaming, unwelcoming fashion industry. Unfortunately, my number one battle remains the cocktail dress. Striking a balance of sexy and sophisticated proves a continuing challenge. Inevitably, I sew a silk wiggle dress, love it in photos, then never reach for it when an event comes up. If I analyze why, a simple answer emerges. I want to be sexy, sophisticated, and not horribly self conscious all night. I hate worrying about panty lines or squeezing myself into some stretchy torture device disguised as shapewear. Y'all, I would throw a bonfire just to burn my Spanx and roast marshmallows over their stretchy corpses. The easiest way out of this conundrum would be to use a luxe fabric, with my tried-and-true dress pattern, Simplicity 1873. Yet...I long for extra details and a bit of sass.

Enter By Hand London's newest pattern: the Kim dress.


When BHL reached out to their testing pool with this pattern, I squealed out loud in delight. There are two Kim variations: a square-necked princess seamed bodice with a tulip skirt, and a sweetheart princess seamed bodice with a gathered, pin-tucked skirt. Jenny actually sent me a message not long after, making sure I'd gotten this e-mail, because the gathered view just screamed "Mary." She was right. So, so right.

Y'all, this is the party dress of my dreams. Not only does it mix sex appeal with sweet design details, but it has a fairly expansive size range. The Kim dress goes up to a UK 20, which translates to measurements of 45-38-48 inches and 114.5-96.5-122 centimeters. That puts me (46-35-46) at a base size 18, so I jumped at the chance to test this baby.

Today, I'm sharing with you that first version of this pattern. Usually, I keep my tested versions of a garment on the down low, because I prefer to blog about finalized patterns. However, since most of the testing pool loved Kim's fit, there aren't substantial changes between this version and one that comes in BHL's envelope. Ergo, I can review it like a real dress. Huzzah! Of course, because this is a quest, my Kim isn't perfect quite yet.  For testing purposes, I sewed as close to the original pattern as possible, which meant choosing a size 18 and performing an FBA, but nothing further. Thus, there are some changes I plan on making the next time around, but we'll get to those.


First, let's talk design, shall we? As you can see, I chose my initial love: the poofy-skirts, divinely feminine View A, sweetheart neckline and all. The bodice is lined in jade cotton batiste and there is a 22'' invisible zipper at the center back seam. Honestly, I was trepidatious about the princess seams of the bodice. Though I'm now to the point where they turn out well, I still find the fitting and sewing of princess seams to be in an utter pain. All that clipping and pressing and smoothing! Egads! Scarier yet, Kim's princess seams didn't come in from the armscye, as is most common, but from the sweetheart neckline itself. This, it turns out, was actually a plus. Since the curve of vertical princess seams is less drastic, the FBA was infinitely easier. After moving the bust point down just a hair, the whole process was a breeze and my pattern pieces didn't distort whatsoever. Considering the end results I'm used to, that was a miracle!

Fabric wise, I chose this beautiful watercolor floral from Hancock Fabrics. It was lovely, had a nice weight, but fluid drape, and was 100% polyester. I usually sew with natural or semi-natural fibers, but couldn't get this gorgeous print out of my head. Each time I visited the store, I would pet it a little, wishing it were silk. So, I bit the bullet and bought it anyhow. It proved really easy to sew up, except for one step: those pintucks. That's the only area of Kim that really gave me fits. I spent hours marking and sewing those pleats, friends. Part of it was the fault of the fabric, which wouldn't hold a crease at all, but the other was the sheer expanse of the gathered skirt. It goes on for eons.  The directions suggested marking certain points, then eyeballing it and using the grainlines to make sure each pleat was even. Call me a perfectionist, but I couldn't handle the unknown. Instead, I marked straight lines in chalk across the entirety of the skirt, and used them as exact guidelines. It worked, but I needed a few glasses of wine at the end of the night.

The rest of Kim was a total cake walk, thank heavens! All the pieces joined beautifully and came together with zero fuss.


Fit wise, the Kim is pretty great for practically out-of-the-pattern. It hits my waist at the right point, hugs my bust in that lovely princess-seamed manner, and is a great hem length for a fancy dress. Next time around, I do plan on making a few changes, though. The neckline is just a hair wide on me, showing a bit too much bustline for comfort, if you catch it at the wrong angle. I'm all for sex appeal, but would like to not worry about scaring children, you know? The shoulders also have a tendency to slip, which is partly a fabric issue, but something to be addressed. So, my game plan: move the straps in by a half-inch and raise the entire neckline by another half-inch, then shrink the armholes a hair. That will keep the sexy silhouette, but make wardrobe malfunctions much less likely.

On the whole, I'm inordinately pleased with the Kim dress. All those little design details really elevate it from the usual fit-and-flare dress. It's the ideal mix of sexy and sophisticated--just the dress pattern I've been looking for! The best thing of all, however? No Spanx required. That requires a happy dance, y'all. So, tell me, what is your go-to party dress pattern? Will you be making one for the holiday season, this year? I just ordered some of this damask velvet from Mood, for a wintry Kim, because I couldn't resist another fancy dress.


Note: This pattern was given to me free of charge, in exchange for testing it and providing accurate feedback. In addition, this post originally appeared on the Curvy Sewing Collective, but I like a record of my projects on Idle Fancy.


Thursday, December 4, 2014

Miss Melinda Needs Longer Arms: Grainline Archer


Good afternoon, my dear chickens! For those of you in the United States, I hope you had a lovely Thanksgiving holiday. My own was filled with perfectly made apple pie (a first!), tons of family, and a lower back injury. Apart from the oh-my-god-I-can't-move back spasms, it was an idyllic holiday. Sam and I really enjoy cooking for masses of people and it was a blast having both of our families at the same table. 

That being said, I have missed quiet weekends. Right before Thanksgiving, we were in Chicago for an academic conference, and the weekend before that was our (newly) annual trip to the Renaissance Fair with Sam's family. We counted it up and it has been over two months since we've had a weekend without travel plans, visitors, or familial obligations. The first two weeks of December, however, are blessedly open. I plan on using the next two weekends to conquer my backlog of sewing projects. Woohoo! 

As far as blogging, I have quite a few unposted pieces to share. It's rare that I photograph projects, without immediately posting them, but life has continually gotten in the way these past weeks. First up on that list is a mixed-bag project: my first long-sleeved Grainline Archer


Autumn in Texas is a funny thing. Our high temperatures can hit anywhere on a forty-degree spectrum, from the bitter chill of the thirties to the lovely, mild seventies. (0°C to 25°C) As such, layers are essential. I love a patterned button-down, because they work solo and layered under a cashmere sweater. Unfortunately, my wardrobe is a bit slim on buttoned shirts. I keep telling myself to make more of them, but if I'm going to spend time fiddling with collar stands and buttons, I'd rather make a shirtdress!

Shocking, right? However, as part of my quest for the perfect shirtdress, I realized my vision lacked something: sleeves. Though it is wonderful in every other way, there isn't a true long-sleeved option for McCall's 6696. To my mind, a perfect long sleeve on shirtdress has a placket, buttons, and cuffs. 
Enter the Archer.

Combining sleeve patterns is one of the easiest changes to make. Swap out the sleeve cap on your foundation pattern for the one on your desired sleeve and--voilà!--a perfect new sleeve. I had high hopes for the Archer sleeve, but didn't want to count on it with precious shirtdress fabric. I also have no time for unnecessary muslins in my life right now. I knew the Archer body worked on me, so I grabbed some polka-dot cotton from my stash and threw caution to the wind. I'd make up an Archer, see how I liked the sleeve once and for all, then decide whether it would work for my frankensleeve!


This did not go well. As it turns out, the larger sizes of the Archer have sleeves fit for Amazons.

On the statuesque side myself*, I've never particularly worried about sleeves being too big. If anything, I usually have the opposite problem. Not so with the Archer. The sleeves on this baby are a good three inches too long and four inches too big around the wrist. Instead of lightly hugging my wrist as a cuff should, these slide right on down my hand and land on my knuckles. It's like I've transplanted sleeves meant for Dwight Howard onto an otherwise reasonably sized shirt.

I'm going to fix this, of course. In fact, I considered doing so before posting this blog and glossing over the whole thing. However, if you were coming to Idle Fancy for perfectly muslined, aspirational garments, you would have stopped following long ago. You deserve to see these sleeves. Why, with my arms down, my hands are barely visible! It's a new trend sweeping (the floors of) the nation!

*5'8'' (172cm) and with what my mother calls "healthy Viking bones," my wrists are decidedly larger than the average woman's. Bangle bracelets are but an optimistic pipe dream and cuffs are rarely this big. 


Eventually, I'm going to pick the cuffs off, shorten and narrow the bottom sleeves, then try the whole shebang again. For my plaid shirtdress, I'm also going to add a tower placket on the sleeve, in lieu of the narrow, banded one of the Archer. 

If you ignore the sleeves, this shirt was an uneventful project. For the bodice, I used my original altered Archer, which added in a bust dart during the FBA. It's a base size 16, with four inches added to the bust line, and the shoulders narrowed by a 1/2 inch. The polka-dotted cotton was printed horribly off-grain, but it worked out. I cut out according to grainline, instead of vertical dot lines, and the scattered pattern hides the flaw well. For buttons, I used plain black ones from the stash and they're the perfect contrast. Once the sleeves are fixed, this will be a fantastic layering shirt! 

In the meantime, I'm trying to convince myself that my arms aren't abnormally short. This is the only problem with sewing, y'all. Adjusting patterns makes over-analyzing your proportions all too easy! Perhaps I have time for full muslins right now, after all...


Thursday, November 13, 2014

Updated Dates: The Autumn of 1000 Shirtdresses

Hello, lovelies! I hope you're staying warm wherever you are. We've gotten a blast of icy weather here in the States, making me long for tea and flannel. Good thing I've started a flannel shirtdress, eh? 

To that end, I have an update on The Autumn of One Thousand Shirtdresses. Quite a few people, myself included, were feeling pressured by the December deadline. With holidays coming up and sewing time becoming precious, it seems silly to add extra stress to anyone! Besides, it's my challenge. I can just change the blasted dates for us all. 

So, The Autumn of One Thousand Shirtdresses has been bumped an extra month and will now end on January 10th. I hope that gives you enough time, post-holidays, to enter the challenge! Next week, I'm going to cover plaid matching, for anyone else who's craving something seasonally festive and stripe-bedecked. 

Remember to add all of your creations to our Flickr board and tag them #1000Shirtdresses on Instagram and Twitter! That way, we can all properly applaud your sewing brilliance. 


Tuesday, November 11, 2014

The Bodice Adjustment Bonanza: Tutorial Round-Up

Good afternoon, dear ones! Today, we're going to discuss bodices. Or, rather, we're going to discuss a dizzying number of ways you can change a bodice to suit both your shape and your style.

As I said at the beginning of The Autumn of 1000 Shirtdresses, I am not going to throw a million of my own tutorials at you. There are few personal reasons for this, including time constraints, but mostly I decided to do it this way, because so much great information is already out there. While I have years of consistent sewing under my belt, I'm by no means an expert. However, I can Google with the best of them. This is how I learned to sew--reading good tutorials, hoarding books by actual experts, and not being afraid to screw things up. That's what muslin and tracing paper are made for!

To that end, I've rounded up some fantastic tutorials today for a myriad of bodice adjustments. While many of these tutorials were made in conjunction with specific patterns, most adjustment tutorials are applicable to a wide range of bodices. Find one that has similar qualities to your pattern (princess seams, two darts, one darts, etc.) and you're set! This list was not made from just blind Googling, but instead carefully curated by looking at forums on each of these topics and seeing which ones worked best for other seamstresses. I'm hoping these tutorial round-ups will help you cut time, when searching for adjustment advice.


Small Bust Adjustments


The Small Bust Adjustment (SBA) is essential for those who find that, while a pattern's shoulders and waist might fit, there's a bit too much room along the bustline. While McCall's 6696, which I'm using throughout this challenge, has separate pieces for A/B and C/D cups, it may still be necessary for you to tweak the pattern to your exact fit needs! These four SBA tutorials below will cover the vast majority of dresses, buttoned or otherwise.

Small Bust Adjustment by Haley for City Stitching -- As part of the Emery Dress sew-a-long, Haley posted this textbook tutorial for an SBA on a two-dart bodice. This tutorial is perfect for patterns like McCall's 6696 and has a ton of clear, helpful pictures.

How To Do a Small Bust Adjustment by Megan Nielsen -- This is a tutorial for dresses with only a bust dart, like the Darling Ranges dress. It's well-written, clear, and uses computerized lines for teaching purposes, which I find really helpful.

My Cup Does Not Runneth Over by Hungry Zombie Couture -- Another look at the small bust adjustment, this tutorial has been recommended all over the place as one that delves deeper into the hows & whys of the SBA. In it, you're shown not only how to make a dart smaller, but how to eliminate one altogether, should you wish.

Princess Seams and the Small Bust by Ann Steeves of Threads -- This is a really simple version of an SBA tutorial, but also gets great reviews in the sewing community. Unlike an FBA, SBAs are fairly straight-forward on a princess seamed bodice and just require a bit of pinching in the right places. How lovely is that?


Full Bust Adjustments: Y-Method

While I've always been a fan of the traditional FBA, as I showed in last week's tutorial, there are many who prefer this updated take on the technique. Pioneered by Palmer/Pletsch, in their Full Busted DVD, this method is best used for FBAs larger than one inch, when the resulting darts can be unwieldy. It's fairly difficult to find good demonstrations of this technique in the wild, but these two are ones I've referred to myself.

Colette Macaron FBA by Alana of Lazy Stitching -- In my opinion, Alana is the queen of demystifying Full Bust Adjustments. She always explains them with such enviable clarity and fearlessness, making the reader completely confident that everything is going to be alright in the end, once you tape those weird bits together. Her FBA for the Macaron is no exception and is, bar none, one of the most exhaustive Y-method tutorials out there. Though the bodice shape is quite different, it's easily translatable to a standard bodice.

Full Bust Adjustment Tips by Alison at Another Little Crafty Creation -- Alison shows a splendid example of a Y-dart method, on the Sewaholic Cambie, as well as tips for splitting up unwieldy darts. While this isn't quite as exhaustive a tutorial as the one above, the images are beautifully clear and helpful.


Moving A Bust Apex

As some of you may have noticed in my FBA tutorial, I treat the moving of an apex as a separate issue, to be dealt with after the completion of an FBA. Not only was this the way I was taught, but I find that many apex issues are mitigated in the process of spreading the bodice pieces, as my own apex is usually in the same horizontal plane as the pattern's. Having a muslin that can actually fit over my bubbies, post-FBA, also helps fine tune the dart locations in a way that flat pattern alterations just can't. To that end, tutorials about simply moving darts are so helpful to have on file!

How to Alter Bust Dart Height by Megan Nielsen -- A fantastic, concise tutorial on moving darts. This is such an easy skill anyway, but Megan's clear images and helpful hints can keep you on the right track.

Fitting Myself: Lowering a Bust Point by Andrea Schewe -- This tutorial is a bit more in depth look at the whys of lowering a bust point, complete with muslin pictures and all the red lines you could wish for. I especially like her tip on sitting, in a tight garment, so you get a real sense of fit.


Splitting Darts

With any Full Bust Adjustment, there is the chance for darts to become unwieldy. Common wisdom states that any dart more than 3 or 4 inches wide is too wide, which may result in puckering or warping. I tend to treat this rule on a pattern-by-pattern basis, but having the ability to split a dart into smaller, more manageable pieces is absolutely invaluable. There is no reason to fight with a 5 inch dart, when you can sew two, perfectly lovely 2.5 inch ones instead.

FBA Bonus: Splitting Darts by Rachel for Coletterie -- This tutorial has gotten a bit of flack in some corners of the internet, but many people have found it extraordinarily helpful. In my opinion, your take on this tutorial is going to depend on whether you prefer multiple waist or bust darts. I don't mind either and find this to be a clear, helpful presentation of this skill, which works on either dart type.

Darling Ranges Dart Manipulation by Megan Nielsen -- I love this tutorial, y'all. LOVE it. In this, Megan quickly goes through almost every kind of thing you can do a dart, from splitting them to curving them. Even better, she does it all with her characteristic attention to detail and clear, helpful images.


Shoulder Adjustments

I am constantly needing to adjust the shoulders on my dress patterns, y'all. Especially as patterns go up in size, shoulders can skew to comical proportions. Reigning them back in is fairly straightforward, but essential. As part of the Emery Dress sewalong, Haley provided two fantastic, well-illustrated tutorials on both aspects of shoulder adjustments.

How to Do a Narrow Shoulder Adjustment by Haley for City Stitching

How to Do a Wide Shoulder Adjustment by Haley for City Stitching


Back Adjustments

Sometimes, the front of the bodice fits beautifully, while the bodice back is a pulling or gaping disaster. Like everything else, there are fixes for these problems, too! Don't you love the never-ending rabbit hole of fitting adjustments? 

Problem Areas: The Back  by Sandra Betzina, excerpted from Fast Fit -- Like everything the great Sandra Betzina explains, these quick adjustments for both narrow and wide backs are a revelation in fitting. Thorough explanations and clear pictures will definitely help you with these common back bodice issues. 

How to Fit My Body by Sunni of A Fashionable Stitch -- I'm going to let you in on a secret, kittens. My number one sewing crush is Sunni, from A Fashionable Stitch, and this tutorial is an excellent example of why. In clear, helpful language, she walks us through her own problems fitting her shoulder blades and how she fixes it. Everything is beautifully explained, easy to replicate on one's own, and it works. I've used this exact method so many times, since first reading her post, and am constantly amazed by its success. I love esoteric fitting tips like this one and Sunni is a fount of them!


Thursday, November 6, 2014

Full Bust Adjustment on a Darted Bodice

Good afternoon, lovelies! As you may have noticed, it's been a bit quiet around here lately. Between traveling, writing on a deadline, and unexpected (though beloved) visitors, my free time has been greatly reduced. I'm hoping to catch back up on the Autumn of 1000 Shirtdresses over the next week, but I also am considering bumping the challenge due date back. Considering we're going to into the holiday season, I can't be the only one warring with a busy schedule! 

However, today and tomorrow, I'm focusing on bust adjustments. This is one of those areas where I'm pretty well versed in some techniques, but have zero experience with others. Since I usually just sew for myself, I have done innumerable full bust adjustments, but never even sniffed around a small bust adjustment. To that end, tomorrow, I'm going to round up links to well-vetted and helpful bust adjustments, including techniques I don't have personal familiarity with. Today, however, I thought I'd share my own FBA for McCall's 6696. 

This adjustment is the most basic of FBAs, for a two-dart bodice. If you are using any pattern with a bust and waist dart, this exact alteration will also work for you! There are more complicated FBA techniques, as almost no problem in sewing has just one answer, but this is the tried-and-true method I usually begin with. 


First off, who needs an FBA? It's going to depend on the pattern you're using, but most Big 4 patterns are drafted using a B-cup bodice and it's rare that Indies are drafted larger than C-cups. If your bra size falls outside this range, then an FBA is for you! Even if your measurements are exactly identical to those on the pattern envelope, chances are weird fitting issues will crop up with a large cup size. It's astounding the number of these issues a good FBA can fix, from floppy shoulders to gaping button bands. Today, we're going to walk through the most basic of FBAs, for a two-dart bodice, but virtually every pattern design can be adapted for large cup sizes.

Before we start the adjustments, however, let's pick a pattern size. McCall's 6696 is a classic two-dart shirtdress pattern with multiple cup sizes. All of the Big 4 pattern companies have introduced pattern lines with multiple cup sizes, which is great because it does a lot of the FBA work for us! This particular pattern goes up to a D cup, which means I still need some room to accommodate my ample 36E bosom.

This pattern goes up to a size 24, or bust measurement of 46 inches (47 for the D-cup piece). It's tempting to look at a pattern size chart and pick based on your usual bust measurement, but that way danger lies. If I made a size 24, it would be a gaping mess everywhere but my girls! Instead, the best method is to choose a bodice based on your high bust measurement.

High Bust vs Full Bust

Mary - High Bust Full Bust

In a well-fitting bra, measure yourself all the way around the very top of your bust line, under your arms and over the beginning of your décolletage. That's your high bust! Now, measure around the fullest part of your bust line. Tada! That's--surprise, surprise--your full bust.

If you're a large cupped woman, these two numbers will be pretty different. My own measurements are a high bust of 41 inches and a full bust of 46 inches, which lines up with my 36E bra size. (Conventional wisdom states that every cup size is an extra half-inch measurement, though you may find this doesn't hold true for you, depending on fit preference.) Above, I've marked my own high bust and full bust, in a side profile picture. See how different those two parts of my bust are? If I pick a size with my high bust measurement, I'm between the size 18 and size 20 bodice, rather than our original size 24. Since my shoulders are wider than average and my waist is a solid size 20, that's the size I usually choose to perform an FBA on.

Note: You may have to grade between sizes at the waist and hip, depending on your proportions and measurements. It's not rare at all to need a size 20 bodice with an FBA, then a size 24 elsewhere. Women, no matter what fashion tells us, are not a standardized shape. That's why we sew, right? The important thing here is getting the right size upper bodice base for your shoulders and upper chest. You can easily grade out to other sizes, for your waist and hips.

Now, let's adjust!

Preparations:
Step One

To get started we're going to need a few materials.
  • Your pattern! Instead of using the original tissue pattern, I highly recommend tracing your pattern onto a more durable type of paper. We're going to be slashing and spreading this baby, after all. Tissue paper is just too flimsy to handle that workmanship! Besides, if you end up wanting to change the fit, it's nice to not have irrevocably messed up the original bodice. Personally, I use Swedish Tracing Paper, which is not only easy to trace on, but sewable for quick fitting checks. Bee Paper is another excellent, very hearty choice. 
  • A clear ruler!
  • Pattern weights! I use large metal washers, which are both weighty and have slim profiles that make cutting around them a breeze.
  • A sharpie or pen!
  • Scissors!
  • Tape!
When you trace off your pattern, be sure to transfer all pattern markings, especially your horizontal lengthen/shorten line and the pattern's bust apex. We'll be using both of those markings to make our cuts in the pattern.

Step One: 

The goal of an FBA is to add fullness to your pattern piece, without sacrificing the fit at your shoulders and waist. To do that, we're going to draw a few lines on our pattern, then cut them to specific points, so that the piece only gets larger where we want! Are you ready? Grab that sharpie, my dear. (Note: Because my own markings were faint, for teaching purposes, I will be showing you this process with bright computerized lines, to make it easier for us all!)


Step Two

First off, draw a straight line through the middle of your waist dart (that one on the bottom) up to the pattern's shoulder, through the bust apex point. Above, you'll see my black bust apex and this first line in bold, bright red.

Step Two:


Step Three

Now, draw Line #2 from your bust point out to your armscye, about 1/3 of the way down from the shoulder. (Shown above in bright blue.) The reason we only go 1/3 of the way down the armscye is to prevent over-distortion of our armhole, which would give us too much blousing on the side.

Step Three: 

Step Four

Next up, we're going to draw a line through our side bust dart to the bust apex. There are two main types of side bust darts you'll encounter: those positioned horizontally to an apex and those which angle up. For both types of dart, we draw Line #3 from the middle dart edge, through the dart tip, over to the bust point. If you're working with a horizontal dart, this will be a perfectly straight line. How easy! If you have an angled dart, as I do, there will be a hinge in your line like my purple one above.

Step Four:

Step Five

The final line we're going to draw is an easy one. From your center front, draw a straight horizontal line to Line #1, just above where your waist dart ends. I've done this in black above!

Woohoo! All your FBA lines are drawn! Not so hard, right? Now, onto the fun cutting parts...

Step Five: 

Step Six

For our first cut, we're going to go up through Line #1 to the bust point, then pivot right there and continue along Line # 2 to your armscye. At the end of Line #2, stop cutting just before the line ends, leaving a small bit of line left intact (about 1/8 inch). We don't want to cut our pattern piece in two, just make it mobile enough that we can spread it out a bit. Leaving this little bit left gives us a "hinge," to move the bodice around.

Step Six:

Step Seven

For our next cut, we're going to cut along Line #3, starting at the dart side and stopping again just before the bust apex, leaving another hinge. See how you can now spread your bodice pieces out quite a bit? The step below shows our new pattern piece, complete with hinges and cuts!

Brief Interlude of Math

Now that your pattern piece is all hinged, we can add in the fullness needed to compensate for our full bust measurement. How  much extra room do you need, however? There are a few ways to determine how much extra fullness you need, but I go with the simplest version. How much difference is between your Full Bust and the stated Bust measurement on the pattern size? Since I'm using a Size 20, D-cup pattern piece, there is a two inch difference between my measurements and those of the pattern size. (Pattern's body measurement: 44 inches; My full bust: 46 inches) That means I need to add an extra two inches to the bodice pattern! Easy, right?

Since a bodice pattern piece is only half of a full bodice, however, this means I'm making a 1-inch FBA.

2 extra inches needed ÷ 2 bodice halves = 1 inch FBA (Extra Room Needed ÷ 2 Bodice Halves = FBA width)

Note: For some multi-cup-size patterns, the stated body measurement for larger cup sizes may not be available. To combat that, subtract your desired ease from the pattern piece's final measurement, which is always found on the printed pattern. For me, on McCall's 6696, I wanted about two inches of ease in the front bodice.

Now, let's start spreading!

Step Seven:

Step Nine - a

The extra fullness we're adding in gets directly added to Line #1, the bright red one that went up from our waist dart. To do this, secure the center front of your pattern piece, then spread your hinged lower bodice down and to the left. Being careful to keep the slash along Line #1 straight, spread your pattern piece out until there is one inch* separating the split Line #1.

See how your dart and armscye have also moved to accommodate your new Line #1? That's exactly what we want. Now, make sure every part is laying flat and your split Line #1 is still straight, with an inch separating it all the way down, then put pattern weights all over the place!

*Use the measurement you got from our Math Interlude. If you're doing a 2-inch FBA, spread it 2 inches, and so forth. 

Step Eight:

Step Nine

Now that your pattern piece is slashed and spread, it's time to make our final cut. You know Line #4? Cut clean through it, from the Center Front all the way to the red line, as demonstrated in black above.

Step Eight: 

Step Ten 

Move that little bodice piece down, until your horizontal lengthen/shorten line is once again even. Secure with a pattern weight!

Step Nine: 

Step Eleven

Very carefully put scrap paper underneath all the holes on your pattern, without shifting it around. (Hooray pattern weights!) Tape this scrap paper down. At each dart, leave extra paper past the pattern's end. We're going to redraw these darts next and will need the extra room!

Step Ten: 

Are you excited about redrawing darts? We're so close to the end. First off, however, we need to mark your bust apex on the new pattern piece. To do this, hold the piece up to yourself and mark the fullest point of your bust on the pattern piece. I've marked my own in blue in the image below.

Step Twelve

Now, there are some standard rules with darts that nobody tells you. You definitely don't want these puppies going all the way to your bust apex. That's how dreadful, pointy hideousness happens! The standard rule of thumb is to position the dart tips one inch away from your bust apex. For larger cup sizes, however, this rule doesn't always hold true. If you have a large bosom, your actual bust apex takes up more room, after all. Over time, you will find what works best for you, but for large busts, I like the dart tips to be two inches from the apex instead.

To mark these, measure two inches to the left of your bust apex, then mark that dot for your side bust dart. Then, measure two inches below your bust apex, and mark that dart for your waist dart. I've marked these dots in purple in the above image.

You have new dart ends! Woohoo!

Note: Some people prefer to mark their apex, before doing an FBA spread, but this depends on personal preference. Whatever order you find the most helpful will come to the same end! I find that my apex is rarely in line with the pattern's apex, but instead on a horizontal plane, just to the outside. (I'm told that this is a common Very Large Bosom issue.) For this reason, I mark it after slashing and spreading, so that I can better see how the dart placement is. If your apex does not line up with the original pattern's or your new slashed bodice, it's really easy to move your darts. I like to do this, after finishing the FBA and find this method particularly helpful. 

Step Eleven:

Step Thirteen

It's now time to redraw your side bust dart! To do this, use your ruler and draw two straight lines from the original dart ends, to your new dart tip. I've done this in purple above. Completely ignore the original dart legs. You're blazing your own path and don't need to follow those! Just go straight to your personal dart tip. 

Step Twelve: 

Step Fourteen

Repeat the same process for your waist dart. Beginning at your original dart ends, draw two straight lines up to your new dart tip. Once again, completely ignore that you're not following the original dart legs. Those don't matter for your needs.

Step Thirteen: 

We're so close to the end! We just need to get rid of all that extra paper.

Step Fifteen B

To do this, fold your new dart legs together, as I have done above on the side bust dart. Once you've folded them together, cut across the end of your pattern piece, noted in black in the above image. Voila! A complete dart is formed! Repeat this process for your second dart.

Step Fourteen:

Step Sixteen

Finally, trim that extra paper along your armscye!

Step Fifteen:

You're done! Do a happy dance!
Then, make a muslin of your new bodice and see how you like the fit.

The End

McCalls 6696 - Idle Fancy -9232

There are, of course, more advanced FBA techniques to cover, but this is a good basic process. You will be amazed by what a simple FBA can do to fix fitting woes! After completing this exact FBA, I ended up with the perfectly fitted bodice of my green shirtdress above. It's so worth the effort, don't you think?

Tomorrow, I'll round up a list of my favorite tutorials for other bust adjustments. This will include a small bust adjustment, dividing unwieldy darts, and moving bust points. There are, also, the aforementioned more complex versions of an FBA that I'll include, for those who are curious about other methods.

Note: All Amazon links in this post are now affiliate links, which means I could get a tiny portion of anything referred from this site. 

UP